
Wall Mount Audio Visual (AV) Racks: Complete Guide to Types, Sizes, Installation & Best Practices
Modern audiovisual systems are becoming more sophisticated, compact, and network-driven. From corporate conference rooms and classrooms to healthcare facilities, hospitality venues, and residential home theaters, professional AV installations often require multiple processors, amplifiers, switches, control systems, power devices, and signal distribution components.
All of this equipment needs a secure, organized, and accessible location.
That is where wall mount AV racks come in.
A wall mount AV rack is a rack enclosure or mounting system designed to secure rack-mountable audiovisual and networking equipment against a wall or other vertical surface. Unlike traditional floor-standing racks, wall-mounted racks help conserve floor space while keeping AV equipment organized, protected, and accessible.
For AV integrators, system designers, IT professionals, and facility managers, choosing the right wall mount rack is more than a matter of equipment size. Rack capacity, depth, weight, ventilation, wall construction, cable management, security, accessibility, and future expansion all affect the reliability of the finished installation.
This guide explains everything AV professionals need to know about wall mount AV racks, including rack types, sizing, installation, thermal management, security, cable organization, applications, and selection criteria.
Key Takeaways
Wall mount AV racks provide secure, organized equipment housing while saving valuable floor space.
Most professional AV racks use the standard 19-inch rack format, allowing compatible equipment from different manufacturers to be installed in the same rack.
Rack size should be determined by rack units (U), equipment depth, weight, ventilation requirements, cable management, and future expansion.
Proper wall structure assessment is essential before installing a loaded wall mount rack.
Thermal management is critical because amplifiers, processors, switches, and other AV equipment can generate significant heat.
Enclosed, open-frame, and swing-frame racks serve different installation requirements.
Professional cable management improves system reliability, troubleshooting, appearance, and future upgrades.
Security features such as locking doors and secured rear panels are particularly important in public, educational, corporate, and high-value installations.
Selecting a rack with additional capacity can make future equipment upgrades significantly easier.
Modern wall mount AV racks can incorporate power distribution, ventilation, environmental monitoring, shelves, cable management, and other accessories.
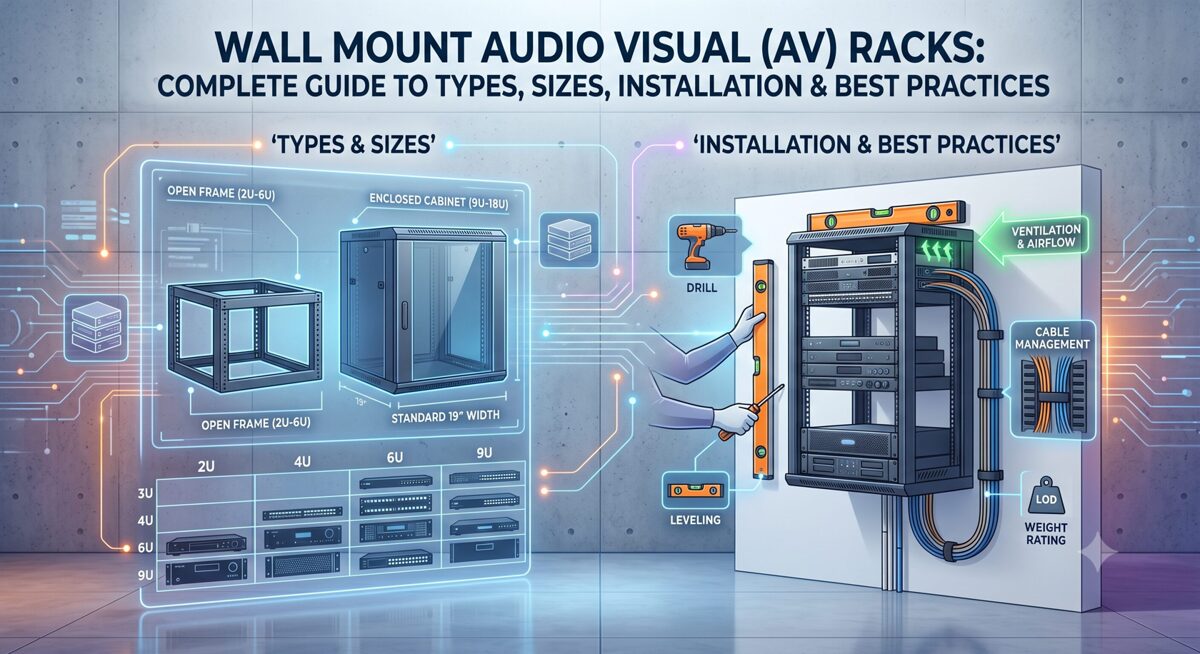
What Is a Wall Mount AV Rack?
A wall mount AV rack is a rack enclosure or mounting framework designed to hold audiovisual, networking, control, and related electronic equipment on a wall.
Most professional models are designed around the 19-inch rack standard, allowing compatible equipment to be secured using standardized mounting rails.
Typical equipment installed in a wall mount AV rack includes:
AV receivers
Audio amplifiers
Digital signal processors (DSPs)
Matrix switchers
Video processors
Network switches
Control processors
Patch panels
Power distribution units
Streaming devices
Media players
Wireless systems
Signal extenders
Automation equipment
Other rack-mountable electronics
Instead of placing this equipment on shelves, desks, floors, or inside improvised cabinets, a rack creates a standardized infrastructure platform.
This improves organization, accessibility, security, ventilation, and maintenance.
What Does "19-Inch Rack" Mean?
The term 19-inch rack refers to the standardized mounting width used by a large amount of professional electronic equipment.
The 19-inch measurement refers primarily to the rack's equipment mounting interface rather than the rack's overall external width.
Equipment height is measured in rack units, commonly written as U.
1U = 1.75 inches of vertical rack height
For example:
1U equipment = 1.75 inches high
2U equipment = 3.5 inches high
4U equipment = 7 inches high
8U equipment = 14 inches high
12U equipment = 21 inches high
This standardized approach allows different manufacturers' rack-mount equipment to be installed within the same infrastructure.
Why Are Wall Mount AV Racks Important?
A wall mount rack is not simply a container for AV equipment.
It is part of the infrastructure that supports system reliability and maintainability.
A well-designed rack installation can provide several benefits.
1. Saves Floor Space
One of the biggest advantages is space efficiency.
By moving AV equipment from the floor to the wall, installers can preserve valuable floor space in:
Conference rooms
Classrooms
Offices
Equipment closets
Hospitality spaces
Residential installations
Retail environments
This is especially useful where every square foot matters.
2. Improves Equipment Organization
Without a rack, AV equipment can become difficult to manage.
Cables may become tangled, power connections may be difficult to identify, and equipment may be stacked improperly.
A rack provides a structured environment where components can be mounted in a logical order.
3. Simplifies Maintenance
A properly organized rack allows technicians to identify equipment and connections more quickly.
Clear labeling, organized cable routing, and accessible equipment can reduce troubleshooting time.
4. Improves Equipment Protection
Enclosed wall mount racks can protect equipment from:
Dust
Accidental contact
Unauthorized access
Physical damage
Cable interference
5. Supports Better Cable Management
Wall mount racks provide dedicated locations for vertical and horizontal cable management accessories.
This helps keep signal, network, control, and power cables organized.
6. Supports Professional Installation Standards
A structured rack installation creates a more professional infrastructure solution than placing equipment loosely on shelves or furniture.

Types of Wall Mount AV Racks
Wall mount AV racks are available in several configurations. The right design depends on the equipment, environment, security requirements, accessibility needs, and thermal load.
1. Open-Frame Wall Mount Racks
Open-frame racks consist primarily of mounting rails and a supporting frame without fully enclosed doors or panels.
Advantages
Excellent natural airflow
Easy equipment access
Easy cable routing
Lower weight
Often lower cost
Simple equipment visibility
Open-frame racks can work well in controlled technical environments such as:
Equipment closets
Server rooms
Back-of-house areas
Utility spaces
Controlled-access technical rooms
Limitations
They provide less protection against:
Dust
Accidental contact
Unauthorized access
Environmental exposure
For public-facing installations, an enclosed rack may be more appropriate.
2. Enclosed Wall Mount AV Racks
Enclosed racks use doors and panels to protect installed equipment.
Depending on the model, an enclosure may include:
Front doors
Rear access panels
Side panels
Ventilation openings
Locks
Adjustable rails
Cable entry points
Advantages
Enclosed wall mount racks can provide:
Better equipment protection
Improved security
Dust reduction
Cleaner appearance
Better physical organization
Reduced accidental contact
They are commonly appropriate for corporate, educational, residential, hospitality, and public-facing environments.
Door Options
Different door designs serve different purposes.
Solid doors provide greater physical protection and can help reduce equipment noise but may restrict airflow.
Perforated doors provide ventilation while maintaining enclosure and security.
Glass or transparent doors allow technicians to visually inspect equipment while keeping the system enclosed.
The correct door configuration depends on the installation's security, airflow, acoustic, and visibility requirements.
3. Swing-Frame Wall Mount Racks
Swing-frame racks use a hinged or pivoting design that allows the rack assembly to move away from the wall.
This can make rear equipment access much easier.
Swing-frame racks are particularly useful when technicians need regular access to:
Rear connectors
Network ports
Audio connections
Control wiring
Power connections
Diagnostic interfaces
They can be valuable in professional AV environments where maintenance access is a major consideration.
Important Consideration: Weight
Swinging a loaded rack changes the forces applied to the mounting structure.
Therefore, installers must follow the manufacturer's specified:
Maximum equipment load
Mounting requirements
Hardware requirements
Swing clearance
Structural requirements
The wall and mounting hardware must be capable of supporting the rack safely in both its normal and extended positions.

How to Choose the Right Wall Mount AV Rack
Choosing a wall mount AV rack should start with the equipment list rather than the rack itself.
The most important factors include:
Rack unit capacity
Equipment depth
Weight capacity
Ventilation
Wall structure
Cable management
Security
Accessibility
Power requirements
Future expansion
Let's examine each one.
1. Calculate Rack Unit Capacity
Start by creating a complete equipment inventory.
Record the rack height of every component.
For example:
| Equipment | Rack Height |
|---|---|
| Network switch | 1U |
| DSP | 1U |
| Matrix switcher | 2U |
| Amplifier | 2U |
| Power distribution | 1U |
| Cable management | 1U |
The total is:
8U
However, an 8U rack may not be the best choice.
You also need to consider:
Cable management
Ventilation
Equipment spacing
Future equipment
Accessories
Service access
For many installations, choosing additional capacity provides more flexibility.
Practical Rule
If your current equipment requires 8U, consider a larger rack if future expansion is expected.
Avoid selecting a rack that is already nearly full on day one.
2. Check Equipment Depth
Rack height is only one dimension.
Equipment depth is equally important.
Some AV devices are shallow, while amplifiers and other equipment can be significantly deeper.
Before selecting a rack, check:
Equipment chassis depth
Connector clearance
Cable bend radius
Rear ventilation requirements
Door clearance
Rail adjustment range
The usable internal depth of the rack should be greater than the equipment's physical depth.
Allow additional room for cables and connectors.
A rack door that technically closes but places excessive pressure on cables is not a properly sized rack.
3. Evaluate Weight Capacity
Every wall mount rack has a specified load rating.
Calculate the total installed equipment weight, including:
AV equipment
Amplifiers
Network equipment
Power distribution
Shelves
Accessories
Cable bundles
Do not consider equipment weight alone.
The wall itself must also be capable of supporting the complete installed load.
For heavier installations, a structural assessment may be necessary.
4. Consider Thermal Management
Thermal management is one of the most important considerations when designing a wall mount AV rack.
AV equipment generates heat during operation.
Examples include:
Power amplifiers
Network switches
DSPs
Video processors
Matrix switchers
Power equipment
If heat cannot escape effectively, internal equipment temperatures may rise.
Excessive heat can contribute to:
Thermal shutdown
Reduced performance
Fan noise
Component degradation
Shortened equipment life
Unexpected system failures
Passive vs. Active Rack Ventilation
Passive Ventilation
Passive ventilation uses:
Perforated doors
Ventilation openings
Vented side panels
Natural convection
It can be appropriate for lower-density installations with manageable heat loads.
A common airflow principle is:
Cool air enters lower areas and warmer air exits through upper areas.
However, actual ventilation requirements should be based on the equipment manufacturer's specifications and the rack's environmental conditions.
Active Ventilation
Active ventilation uses fans to move air through the enclosure.
Fan systems may be necessary when:
Equipment density is high
Heat output is significant
The enclosure is tightly packed
Ambient temperatures are high
Natural convection is insufficient
Fan noise should also be considered when the rack is installed near people.
For conference rooms, classrooms, offices, and residential spaces, unnecessarily loud fans can become a usability problem.
5. Think About Future Expansion
A rack should support today's equipment without making tomorrow's upgrade difficult.
Future requirements may include:
Additional network switches
More DSP equipment
New video distribution hardware
Additional amplifiers
Control processors
Streaming equipment
Power management
Monitoring equipment
Leaving expansion capacity can reduce the need to replace the rack later.
6. Evaluate Security Requirements
Security requirements vary depending on the environment.
A rack in a locked equipment room may not need the same security features as a rack installed in a classroom or public area.
Potential security features include:
Lockable front doors
Lockable rear panels
Security fasteners
Tamper-resistant hardware
Electronic access control
Access monitoring
For high-value installations, security should be treated as part of the overall system design rather than an afterthought.
Wall Mount AV Rack Installation Guide
Correct installation is essential.
Even a high-quality rack can become unsafe if it is mounted incorrectly.
Step 1: Identify the Wall Structure
Before drilling, determine whether the wall is:
Wood stud construction
Metal stud construction
Concrete
Masonry
Hollow wall construction
Another structural system
Do not assume that drywall alone can support a loaded AV rack.
The rack should be attached to suitable structural members or an appropriately engineered mounting system.
Step 2: Determine the Total Load
Calculate:
Rack weight + equipment weight + accessories + cable weight
The mounting system must safely support the complete load.
For larger or critical installations, structural engineering input may be appropriate.
Step 3: Select Appropriate Mounting Hardware
The mounting hardware must match the wall construction.
Potential solutions can include:
Structural screws
Lag screws
Toggle anchors
Concrete anchors
Masonry anchors
Reinforced mounting plates
Other manufacturer-approved hardware
The correct fastener depends on the wall material and expected load.
Never select anchors based only on convenience.
Step 4: Mark and Level the Rack
A rack should be accurately positioned before final fastening.
Use a suitable level to confirm:
Horizontal alignment
Vertical alignment
Mounting plate position
An improperly aligned rack can create mechanical stress and make equipment installation more difficult.
Step 5: Secure the Rack
Install the required mounting hardware according to the manufacturer's instructions.
Fasteners should be properly tightened without over-tightening.
For installations with significant vibration or heavy equipment, verify the mounting system after loading the rack.
Step 6: Install Equipment Strategically
Equipment placement matters.
A practical approach is to place heavier equipment lower in the rack.
For example:
Heavy amplifiers → lower positions
Network equipment → middle positions
Lightweight processors → upper positions
This can help improve load distribution and simplify maintenance.
Heat-producing equipment should also be positioned with adequate airflow.
Step 7: Plan Cable Routing
Install cable management before the rack becomes overcrowded.
Consider separate pathways for:
Power
Audio
Video
Network
Control
Antenna/RF
Other low-voltage signals
Where appropriate, maintain separation between power and signal cables to reduce potential interference and simplify troubleshooting.
Cable Management Best Practices for Wall Mount AV Racks
Cable management is one of the clearest differences between a temporary installation and a professional AV infrastructure system.
Good cable management should provide:
Organization
Accessibility
Strain relief
Identification
Serviceability
Expansion capacity
Use Vertical Cable Management
Vertical channels provide organized pathways along the sides or rear of the rack.
They are useful for managing large cable bundles.
Use Horizontal Cable Management
Horizontal panels can be installed between equipment sections.
Common options include:
D-rings
Brush panels
Finger ducts
Cable pass-through panels
Label Both Ends
Every important cable should be identifiable at both ends.
A good labeling system can significantly reduce troubleshooting time.
Labels should be:
Clear
Consistent
Durable
Easy to read
Leave Service Loops
Avoid pulling cables excessively tight.
Service loops provide additional cable length for:
Equipment replacement
Maintenance
Reconfiguration
Troubleshooting
Avoid Overcrowding
A rack should never be treated as a place to fit as many cables as physically possible.
Overcrowding can:
Restrict airflow
Increase cable stress
Make maintenance difficult
Complicate upgrades
Advanced Features in Modern Wall Mount AV Racks
Modern racks can offer much more than basic equipment mounting.
Integrated Power Distribution
Rack-mounted power distribution units can provide organized power delivery to multiple devices.
Depending on the model, features may include:
Multiple outlets
Circuit protection
Surge protection
Remote monitoring
Current monitoring
Switched outlets
The PDU should always be selected according to the electrical requirements of the installation.
Environmental Monitoring
Advanced AV installations may benefit from monitoring:
Temperature
Humidity
Power consumption
Door access
Rack conditions
Monitoring can help identify problems before they cause equipment failure.
For distributed AV systems, remote monitoring can be particularly valuable because technicians may not need to physically inspect every rack to identify an environmental problem.
Adjustable Mounting Rails
Adjustable rails provide greater equipment compatibility.
They allow installers to position mounting rails according to different equipment depths.
This is particularly useful when a single rack contains equipment from multiple manufacturers with different chassis dimensions.
Shelves and Adapter Plates
Not every device is rack-mountable.
Shelves and adapter brackets can accommodate:
Media players
Small computers
Consumer electronics
Control devices
Legacy equipment
Specialized hardware
This allows non-rack equipment to be incorporated into an organized professional rack system.
Wall Mount AV Rack Applications
Wall mount AV racks are used across a wide range of professional environments.
Corporate Conference Rooms
Corporate conference rooms commonly use racks to house:
Video conferencing equipment
DSPs
Network switches
Matrix switchers
Control processors
Power equipment
Wall mounting helps preserve floor space while keeping equipment organized.
Educational Facilities
Schools, colleges, universities, and training centers use AV racks for:
Classroom AV
Lecture halls
Video distribution
Digital signage
Audio systems
Distance learning
Campus networking
Security is particularly important because equipment may be installed in areas accessible to students and staff.
Healthcare Facilities
Healthcare applications can include:
Patient entertainment
Digital signage
Telemedicine
Video distribution
Surgical video systems
Clinical AV infrastructure
Healthcare installations can involve additional environmental, security, reliability, and compliance considerations.
Critical systems should be designed according to the applicable facility and regulatory requirements.
Hospitality
Hotels, resorts, conference centers, and entertainment venues often use distributed AV systems.
Wall mount racks can house equipment for:
Background music
Digital signage
Television distribution
Conference rooms
Entertainment systems
Networked AV
Standardizing rack configurations across multiple locations can simplify maintenance.
Residential AV and Home Theater
High-end residential installations can also benefit from professional wall mount racks.
Applications include:
Home theaters
Whole-house audio
Video distribution
Smart home control
Network infrastructure
Media systems
In residential applications, noise management can be particularly important.
Fan systems and equipment placement should be selected with occupant comfort in mind.
Wall Mount AV Rack Maintenance Checklist
Regular maintenance helps protect equipment and extend system life.
Monthly or Periodic Checks
Inspect rack mounting points
Check equipment mounting screws
Inspect cable connections
Check for excessive dust
Verify ventilation openings
Look for abnormal fan noise
Check for unusual heat
Quarterly Checks
Depending on the environment:
Clean ventilation openings
Clean fan filters
Inspect cable organization
Verify equipment temperatures
Check rack doors and locks
Annual Checks
A comprehensive inspection can include:
Structural inspection
Mounting hardware inspection
Equipment inspection
Cable documentation updates
Rack capacity review
Thermal performance assessment
Power distribution review
Security feature testing
Maintenance frequency should increase in dusty, hot, humid, or high-use environments.

Common Wall Mount AV Rack Mistakes to Avoid
Mistake 1: Choosing the Rack Before the Equipment
Always create the equipment list first.
Mistake 2: Ignoring Equipment Depth
A rack can have enough U capacity but still be too shallow.
Mistake 3: Underestimating Heat
High-density AV equipment can generate significant heat.
Mistake 4: Mounting to Weak Wall Material
The rack must be supported by an appropriate structural system.
Mistake 5: Filling Every Rack Unit
Leave room for cable management, ventilation, and future expansion.
Mistake 6: Poor Cable Labeling
Unlabeled cables make future maintenance unnecessarily difficult.
Mistake 7: Ignoring Rear Access
Equipment with rear connections requires a realistic maintenance strategy.
Mistake 8: Overlooking Security
Public or accessible environments may require lockable enclosures.
Mistake 9: Ignoring Noise
Fans and equipment can create unwanted noise in occupied spaces.
Mistake 10: Treating Installation as an Afterthought
Rack selection, wall structure, ventilation, power, and cable management should be considered during system design—not after equipment arrives.
How to Specify a Wall Mount AV Rack
A professional AV rack specification should document more than rack size.
A useful specification can include:
Rack type: Enclosed / open-frame / swing-frame
Rack capacity: XXU
Equipment depth: XX inches
Load requirement: XX lb/kg
Mounting surface: Wood stud / metal stud / concrete / masonry
Door: Solid / perforated / transparent
Ventilation: Passive / active
Security: Lockable / standard
Cable management: Vertical + horizontal
Power: Rack-mounted PDU
Future capacity: XX%
Accessories: Shelves / panels / fans / monitoring
This approach helps ensure that the rack specification matches the overall AV system design.
Wall Mount AV Rack vs. Floor-Standing Rack
| Feature | Wall Mount AV Rack | Floor-Standing Rack |
|---|---|---|
| Floor-space efficiency | Excellent | Lower |
| Large equipment capacity | Limited to moderate | Excellent |
| Installation | Requires suitable wall structure | Floor-supported |
| Accessibility | Depends on design | Generally easier |
| Distributed AV systems | Excellent | Good |
| Heavy equipment | Requires careful structural planning | Generally easier |
| Small installations | Excellent | Often excessive |
| Security | Available with enclosed models | Available |
| Cable management | Excellent | Excellent |
| Expansion | Depends on rack size | Usually greater |
The choice depends on the project's equipment, available space, structural conditions, maintenance requirements, and future expansion plans.
Frequently Asked Questions About Wall Mount AV Racks
What is a wall mount AV rack?
A wall mount AV rack is a wall-mounted enclosure or mounting framework designed to house professional audiovisual, networking, control, and related electronic equipment. Most models use standardized rack mounting dimensions and are available in open-frame, enclosed, or swing-frame configurations.
What size wall mount AV rack do I need?
Determine the required rack size by adding the rack-unit height of all equipment, then allowing additional space for cable management, ventilation, accessories, and future expansion. Equipment depth and total weight should also be checked before selecting the rack.
How many inches is 1U in an AV rack?
One rack unit, or 1U, equals 1.75 inches of vertical equipment height.
Can a wall mount AV rack hold an amplifier?
Yes, provided the rack has sufficient depth, rack-unit capacity, ventilation, and weight capacity for the amplifier. Because amplifiers can generate significant heat and may be relatively heavy, thermal management and structural support should receive particular attention.
Can I install a wall mount AV rack on drywall?
A wall mount rack should not rely on unsupported drywall alone when carrying significant equipment loads. The rack should be attached to appropriate structural members or an engineered mounting system using hardware suitable for the wall construction and expected load.
Do wall mount AV racks need ventilation?
Many installations do. The required ventilation depends on the equipment's heat output, rack design, ambient temperature, enclosure configuration, and manufacturer requirements. Passive ventilation may be sufficient for some systems, while high-density installations may require active fan-based cooling.
What is the difference between an open-frame and enclosed AV rack?
An open-frame rack provides easy access and excellent airflow but offers limited protection and security. An enclosed rack provides greater protection, security, and a cleaner appearance but requires more careful thermal management.
Are swing-frame AV racks worth it?
Swing-frame racks can be valuable when frequent rear access is required. They allow technicians to reach rear connections without completely removing the rack from the wall. However, the rack, wall structure, and mounting hardware must be rated for the installed load and swing-out configuration.
How should equipment be arranged inside an AV rack?
A common approach is to place heavier equipment toward the lower portion of the rack, organize equipment logically, provide adequate ventilation, and leave appropriate space for cable management and service access. The manufacturer's installation and ventilation requirements should always take priority.
How much space should I leave for future expansion?
There is no universal percentage that applies to every project, but designing additional capacity into the rack can make future upgrades easier. The amount should be based on the client's roadmap, expected technology changes, equipment density, and available installation space.
How do I improve cable management in a wall mount rack?
Use vertical and horizontal cable management, label cables at both ends, maintain appropriate service loops, separate power and signal pathways where appropriate, and avoid excessive cable bundling that restricts airflow or creates connector stress.
How often should a wall mount AV rack be maintained?
Maintenance frequency depends on the environment and equipment. Periodic inspections should check mounting hardware, ventilation, fans, cables, equipment temperatures, and security features. Dusty or high-use environments may require more frequent cleaning and inspection.
Wall Mount AV Rack Selection Checklist
Before purchasing or specifying a wall mount AV rack, verify the following:
Equipment
Complete equipment inventory created
Rack-unit requirements calculated
Equipment depth verified
Connector clearance verified
Equipment weight calculated
Future equipment considered
Rack
Rack capacity confirmed
Load rating confirmed
Rail configuration verified
Door type selected
Security requirements addressed
Cable entry points confirmed
Thermal
Equipment heat output reviewed
Passive ventilation evaluated
Active cooling considered where necessary
Fan noise considered
Ambient temperature reviewed
Installation
Wall construction identified
Structural mounting points confirmed
Correct anchors selected
Rack position measured
Rack leveled
Mounting hardware installed correctly
Cable Management
Vertical management planned
Horizontal management planned
Cable labels prepared
Service loops included
Power and signal routing considered
Maintenance
Rear access strategy defined
Equipment documentation created
Cable documentation created
Maintenance schedule established
Future expansion strategy considered
Conclusion
Wall mount AV racks are an important part of professional audiovisual infrastructure. They provide a structured way to secure, organize, protect, cool, and maintain AV equipment while minimizing the amount of floor space required.
The right rack, however, is not simply the one with enough rack units.
AV professionals need to evaluate the complete installation environment, including equipment dimensions, rack capacity, depth, weight, ventilation, wall construction, cable management, security, accessibility, power, and future expansion.
For smaller distributed AV systems, an open-frame or compact enclosed rack may provide the ideal balance between accessibility and space efficiency. For public or security-sensitive environments, an enclosed locking cabinet may be more appropriate. Where frequent rear access is required, a swing-frame design can simplify maintenance.
Thermal management should also be treated as a core design requirement. High-density equipment can generate substantial heat, making ventilation, equipment spacing, airflow direction, and active cooling important considerations.
Installation quality is equally important. A properly specified rack can still become a safety or reliability problem if it is mounted to an unsuitable wall, loaded beyond its rating, poorly ventilated, or inadequately organized.
As AV systems continue moving toward higher equipment density, network-based architectures, distributed processing, remote monitoring, and integrated control, rack infrastructure will become increasingly important.
For AV integrators, system designers, IT professionals, facility managers, and technology decision-makers, understanding wall mount AV rack fundamentals helps create installations that are safer, easier to maintain, more scalable, and more reliable.
Ultimately, a professional AV system is only as dependable as the infrastructure supporting it. A well-designed wall mount AV rack provides that infrastructure by bringing together equipment protection, organization, thermal management, security, cable management, and serviceability in a single installation solution.