
Flipkart Big Billion Days 2026: How to Find the Best Deals and Shop Smarter

Festive shopping in India has become closely associated with online sales, and Flipkart Big Billion Days 2026 is once again expected to be one of the biggest shopping events of the year. From smartphones and laptops to fashion, home appliances, beauty products, furniture, and everyday essentials, the sale brings a wide range of products together with discounts, bank offers, exchange benefits, cashback opportunities, and other promotional deals.
Flipkart has officially announced that Big Billion Days 2026 will begin with early access on October 8, 2026, while general access starts on October 9, 2026. Eligible Flipkart Plus and VIP members and certain eligible credit-card holders can get early access.
But finding a genuinely good deal during a large sale is not simply about looking for the biggest percentage discount. A product showing “50% off” is not automatically a better purchase than another product with a smaller advertised discount.
Smart shoppers need to consider the product's historical price, specifications, seller, warranty, return policy, bank offers, exchange value, and the final amount payable after all applicable benefits.
This guide explains how Flipkart Big Billion Days works, what categories to watch, how to compare deals, how to prepare before the sale, and how to avoid common shopping mistakes.
Key Takeaways
Flipkart Big Billion Days 2026 begins with early access on October 8 and opens to the general public on October 9.
Major categories include mobiles, laptops, electronics, televisions, appliances, fashion, beauty, home and furniture.
The lowest advertised price is not always the best deal.
Compare the final payable price rather than relying only on the discount percentage.
Check bank offers, exchange benefits, cashback, SuperCoins, and EMI terms separately.
Add important products to your wishlist before the sale so you can monitor their prices.
Compare specifications and reviews before buying expensive electronics.
Check seller ratings, warranty information, return policies, and delivery details.
Avoid impulse purchases simply because a product has a limited-time discount.
Deal-discovery resources such as Pin 2 Cart Deals can help shoppers organize and discover online shopping offers more efficiently.
What Is Flipkart Big Billion Days?
Flipkart Big Billion Days, commonly called BBD, is Flipkart's major annual festive shopping event in India.
The sale covers numerous product categories and combines product-level discounts with additional promotions such as bank offers, exchange programs, EMI options, SuperCoins, and other incentives.
For 2026, Flipkart's official information highlights categories including mobiles and tablets, electronics, TVs and appliances, fashion and beauty, and home and furniture.
The importance of BBD goes beyond discounts. For shoppers, it provides an opportunity to plan large purchases around the festive season. For brands and sellers, it is an important period for reaching customers and increasing sales.
Flipkart has also expanded its festive supply-chain infrastructure ahead of the 2026 event, including additional capacity and coverage across more PIN codes.
When Is Flipkart Big Billion Days 2026?
The officially announced schedule is:
Early Access: October 8, 2026
General Access: October 9, 2026
Early access is available to eligible Flipkart Plus and VIP members as well as certain eligible credit-card holders. General shoppers can participate from October 9.
However, shoppers should not assume that every deal will remain available throughout the sale. Popular products can have limited inventory, while some promotional prices may be available only for a particular period.
That is why preparation before the sale can make a significant difference.
Why Is Big Billion Days So Popular?
There are several reasons why Flipkart Big Billion Days attracts millions of shoppers.
1. Wide Product Selection
Instead of focusing on one product category, BBD covers everything from consumer electronics to fashion and household products.
This makes the event relevant to different types of shoppers.
Someone looking for a smartphone can compare mobile offers, while another shopper may be looking for a washing machine, laptop, footwear, furniture, or kitchen appliance.
2. Multiple Types of Savings
The final price of a product can potentially be affected by several benefits.
These may include:
Product discounts
Bank discounts
Exchange offers
Cashback
SuperCoins
EMI-related benefits
Promotional coupons
Limited-time deals
The important point is that shoppers should check which benefits actually apply to their specific product and payment method.
3. Festive Shopping
The timing of Big Billion Days makes it particularly relevant to India's festive shopping season.
Many consumers plan purchases around festivals, weddings, home upgrades, gifting, and personal technology upgrades.
4. Early Access
Eligible shoppers can access the sale before general shoppers, giving them an opportunity to check deals earlier. For popular products, early access can be particularly useful.
Which Categories Should You Watch During BBD 2026?
Not every category requires the same buying strategy. Here are some of the major areas worth monitoring.
Smartphones

Smartphones are among the most closely watched products during large online sales.
If you are planning a phone upgrade, don't focus only on the headline discount.
Compare:
Processor
RAM
Storage
Display
Camera system
Battery capacity
Charging speed
Software support
5G compatibility
Warranty
Exchange value
A slightly older flagship may sometimes provide better value than a newly launched mid-range phone.
Laptops

For laptops, specifications should take priority over the discount percentage.
Check:
Processor generation
RAM
SSD capacity
Display resolution
Refresh rate
Graphics processor
Battery
Weight
Operating system
Warranty
A laptop with a large advertised discount can still be poor value if its specifications do not match your requirements.
TVs and Home Appliances

Big sales can be useful for planned home upgrades.
Products worth monitoring include:
Smart TVs
Refrigerators
Washing machines
Air conditioners
Microwaves
Air fryers
Vacuum cleaners
Kitchen appliances
For large appliances, also consider installation, warranty, energy efficiency, service availability, and return or replacement conditions.
Fashion

Fashion deals can be attractive during festive shopping because shoppers often purchase multiple items.
Instead of buying based purely on discounts, check:
Size availability
Material
Brand
Return policy
Customer reviews
Product images
Seller information
A 70% discount does not provide much value if the product does not meet your expectations.
Beauty and Personal Care

Beauty products require additional attention to authenticity and seller information.
Before buying, check the brand, seller, packaging information, reviews, expiry details where applicable, and return policy.
Home and Furniture

Furniture and home products can involve higher purchase values and more complicated delivery requirements.
Before ordering, check dimensions carefully.
Measure the available space at home and compare it with the product's dimensions. Also check delivery restrictions, installation requirements, warranty, and return conditions.
How to Find the Best Flipkart Big Billion Days Deals
Finding a good deal requires more than opening the Flipkart app on sale day.
Use a structured approach.
Step 1: Make a Shopping List
Before the sale begins, create three categories:
Need now
Products that you genuinely need.
Planned upgrade
Products you have been considering for some time.
Nice to have
Products you may purchase only if the price becomes particularly attractive.
This simple system can reduce impulse purchases.
Step 2: Create a Wishlist
Add products you are seriously considering to your wishlist before the sale.
For example, if you need a laptop, shortlist three or four models instead of waiting until the sale begins.
This makes comparison easier when prices change.
Step 3: Record the Current Price
Knowing the price before the sale helps you understand whether the advertised discount represents meaningful savings.
You can maintain a simple note containing:
Product → Current price → Expected sale price → Maximum budget
This gives you a reference point.
Step 4: Compare Similar Products
Don't compare only one product.
If you're purchasing a smartphone, compare two or three alternatives.
For laptops, compare processors, RAM, storage, display and warranty.
For appliances, compare capacity, energy efficiency and features.
Step 5: Calculate the Final Price
This is one of the most important steps.
Suppose a product has:
Listed price: ₹50,000
Sale discount: ₹5,000
Bank benefit: ₹2,000
Exchange benefit: ₹3,000
The relevant figure is not simply the advertised discount percentage. You should determine the final price applicable to your transaction.
Also check whether each benefit is conditional.
Don't Ignore Bank Offers
Payment-related promotions can significantly affect the final price.
Flipkart's current BBD information lists additional savings through eligible payment methods, including offers associated with Axis Bank and ICICI Bank cards, along with other payment incentives. Terms and eligibility apply.
Before placing an order, check:
Eligible card
Minimum transaction value
Maximum discount
Offer validity
EMI requirements
Whether the offer applies to the specific product
Whether cashback or discount is instant
Never assume that an advertised bank offer automatically applies to every product.
Should You Use No-Cost EMI?
No-cost EMI can make an expensive purchase easier to manage, but shoppers should still understand the transaction.
Before choosing EMI, check:
Total payable amount
Processing fee
Tenure
Eligibility
Applicable discounts
Refund conditions
Whether the advertised discount is tied to EMI
If you already have the money available and the product is within your budget, compare the total cost of paying upfront versus EMI.
The goal should be affordability—not purchasing a more expensive product simply because the monthly payment appears smaller.
How to Use Exchange Offers Wisely
Exchange programs can make smartphones, laptops and other electronics more affordable.
However, don't assume the displayed exchange value is guaranteed.
The actual value can depend on:
Device model
Device condition
Screen condition
Functionality
Accessories
Verification
Eligibility
Exchange terms
If you are buying a new phone, determine the expected value of your existing phone separately before deciding whether the exchange is worthwhile.
How to Avoid Fake or Misleading Deals
Large sales naturally create urgency.
You may see messages such as:
Limited stock
Deal ending soon
Only a few units left
Massive discount
Exclusive offer
These messages can encourage impulse buying.
Instead of reacting immediately, ask:
Was this product already on my shopping list?
Is the final price within my budget?
Does the product have good reviews?
Is the specification suitable for my needs?
Does the seller have a reliable track record?
Do I actually need it?
This five-question check can prevent many unnecessary purchases.
Check Reviews—But Read Them Carefully
Customer reviews can provide useful information, but don't rely on the overall rating alone.
Look for repeated comments about:
Product quality
Build quality
Battery
Performance
Delivery
Packaging
Installation
Warranty
After-sales service
Also pay attention to recent reviews.
For technical products, reviews from people using the product for a similar purpose can be particularly valuable.
For example, a laptop used for office work may not be suitable for someone who needs it for video editing or gaming.
Use Deal Discovery Resources to Save Time
During a major sale, thousands of products can make deal discovery difficult.
Instead of manually searching through product pages, shoppers can use deal-discovery platforms, curated lists, newsletters, social media pages, and shopping communities.
For example, Pin 2 Cart Deals can be used as a destination for discovering and organizing online shopping deals and product recommendations.
The advantage of curated deal content is that it can help shoppers narrow down choices instead of browsing thousands of products without a clear buying objective.
However, consumers should always verify the final price, seller, product specifications, terms, and availability on the retailer's website before purchasing.
Best Strategy for Buying Smartphones During BBD
If you're buying a smartphone, follow this sequence:
1. Decide your budget
For example:
Under ₹15,000
₹15,000–₹25,000
₹25,000–₹40,000
₹40,000+
2. Identify your priorities
Do you care most about:
Camera?
Gaming?
Battery?
Display?
Performance?
Software updates?
Design?
3. Shortlist three models
Avoid choosing the first discounted phone you see.
4. Compare the complete price
Consider sale price + bank offer + exchange value + applicable rewards.
5. Check reviews
Make sure the product performs well in real-world usage.
Best Strategy for Buying Electronics
Electronics often have multiple generations and variants.
A smart approach is to identify the exact model number.
Two products may look almost identical but have different:
Processors
Storage
RAM
Display panels
Ports
Connectivity
Warranty terms
Before buying, compare the complete specification sheet.
What Should You Avoid Buying Just Because of a Discount?
Not every discounted product is a bargain.
Be cautious with:
Products you don't actually need
Very old electronics
Products with consistently poor reviews
Unknown brands with limited support
Products with unclear warranty information
Items where the discount is based on an inflated comparison price
Products whose specifications don't meet your requirements
The biggest saving is sometimes not buying something you don't need.
Create a BBD Shopping Budget
A simple budget can make your shopping more disciplined.
Divide your money into:
Essential purchases
Products you definitely need.
Planned purchases
Products you have been saving for.
Optional purchases
Products you will buy only if the deal is exceptional.
For example, if your maximum BBD budget is ₹50,000, don't spend ₹80,000 just because several products appear discounted.
A sale is successful when you save money on purchases you genuinely needed—not when you buy the largest number of discounted products.
A Simple BBD Deal-Checking Checklist
Before clicking Buy Now, check these ten things:
Is this product actually needed?
Is the final price within your budget?
Did you compare alternative products?
Is the seller reliable?
Are the reviews satisfactory?
Is the warranty clearly mentioned?
Did you check the return/replacement policy?
Does the bank offer actually apply?
Is the exchange value realistic?
Would you still buy the product without the countdown timer?
If the answer to all ten questions is satisfactory, you are much more likely to be making a considered purchase.
Frequently Asked Questions About Flipkart Big Billion Days 2026
When is Flipkart Big Billion Days 2026?
Flipkart has announced that Big Billion Days 2026 begins with early access on October 8, 2026, while general access begins on October 9, 2026.
Who gets early access to Flipkart Big Billion Days?
Eligible Flipkart Plus and VIP members and certain eligible credit-card holders can receive early access. Eligibility and terms may vary.
What products are discounted during Big Billion Days?
Major categories include smartphones, tablets, laptops, electronics, televisions, appliances, fashion, beauty, home products, furniture and other consumer products.
Are Big Billion Days discounts genuine?
Sale prices can provide meaningful savings, but shoppers should compare prices and specifications before purchasing. A large advertised percentage discount does not automatically mean the product offers the best value.
How can I get the best BBD price?
Create a wishlist before the sale, compare competing products, check bank offers and exchange benefits, and calculate the final payable amount before ordering.
Is it better to buy during early access?
Early access can give eligible shoppers an opportunity to access deals before general shoppers. However, whether it is better depends on the specific product, inventory and offer available.
Should I wait until the final day of the sale?
There is no universal rule. Some products may receive attractive offers at different times, while popular products may have limited availability. If you find a genuinely good deal on a product you already planned to purchase, waiting solely for a lower price can involve some risk.
How do I know whether a BBD deal is worth buying?
Compare the final price, specifications, reviews, seller information, warranty, return policy and competing products. Don't judge the deal solely by the percentage discount.
Can I save more using bank offers?
Potentially, yes. Flipkart lists additional payment-related offers during BBD, but eligibility, minimum transaction values, maximum discounts and terms can apply.
What is the biggest mistake shoppers make during Big Billion Days?
One of the most common mistakes is buying products simply because they appear heavily discounted. A planned purchase with a suitable specification and genuine price advantage is usually more valuable than an unnecessary impulse purchase.
Conclusion
Flipkart Big Billion Days 2026 can be an excellent opportunity to purchase smartphones, laptops, electronics, appliances, fashion, home products and other items at attractive prices.
However, the smartest shoppers don't simply chase the biggest discount.
They plan their purchases, create wishlists, compare products, research specifications, check seller information, understand payment offers and calculate the final price before placing an order.
The official 2026 sale begins with early access on October 8, followed by general access on October 9.
Whether you're planning a major technology upgrade or simply looking for everyday shopping deals, preparation can make the difference between an impulse purchase and a genuinely valuable deal.
Before the sale begins, create your shortlist, establish your budget and identify the products that are actually worth buying. Then use deal-discovery resources such as Pin 2 Cart Deals to help discover relevant offers while independently verifying the final price and terms before checkout.
The goal of a successful sale isn't to buy more. It's to buy better—and spend smarter.
Minimalist Desk Setup: How to Create a Clean & Clutter-Free Workspace
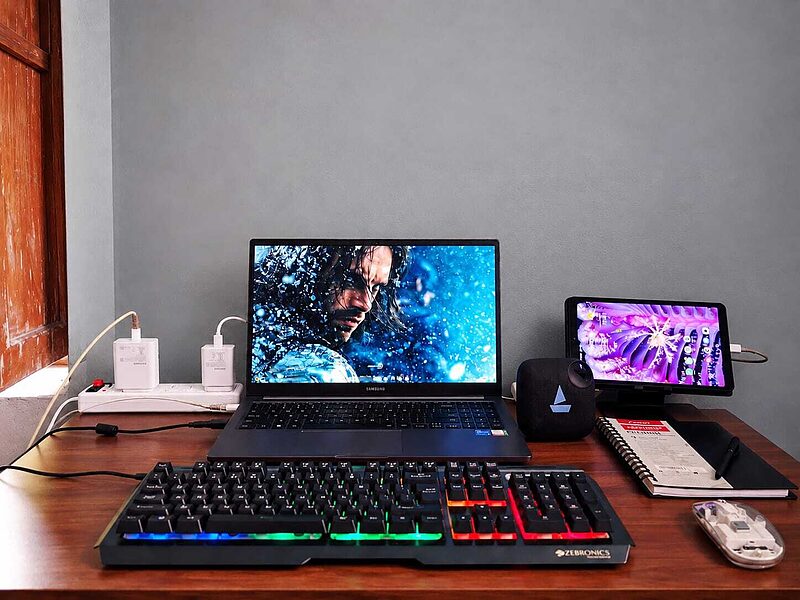
A cluttered desk can make even a simple workday feel overwhelming. Papers pile up, cables become tangled, unnecessary accessories take up valuable space, and before long, your workspace becomes difficult to use.
A minimalist desk setup takes the opposite approach.
Instead of filling your workspace with unnecessary items, minimalist desk design focuses on keeping only the things you genuinely need. The result is a clean, organized, functional, and visually appealing workspace that can make it easier to focus on your work.
A minimalist workspace does not necessarily mean owning only one monitor, a tiny desk, or an empty tabletop. It means being intentional about what you place in your workspace.
Whether you work from home, study, create content, manage a business, program, or simply use a computer every day, a minimalist desk setup can help you create a more comfortable and organized environment.
The good news is that you do not need to spend a fortune creating one.
With the right desk, monitor arrangement, cable management, lighting, storage, and accessories, you can transform an ordinary workspace into a clean and functional minimalist workstation.
This guide explains how to create a minimalist desk setup, what accessories you actually need, how to organize cables, how to choose the right desk and lighting, and which common mistakes to avoid.
Key Takeaways
A minimalist desk setup focuses on function, simplicity, and organization.
Minimalism does not mean having an empty desk; every item should have a purpose.
Start by removing unnecessary items before buying new accessories.
Choose a desk that provides enough workspace without taking up unnecessary room.
Keep frequently used items within easy reach and store everything else.
Cable management is one of the easiest ways to create a cleaner workspace.
A monitor arm or monitor stand can free up valuable desk space.
Choose simple and functional desk accessories instead of decorative clutter.
Good lighting is important for both comfort and workspace aesthetics.
Use drawers, shelves, pegboards, and organizers to keep the desktop clear.
Ergonomics should remain a priority even when designing a minimalist workspace.
Review your desk regularly and remove items you no longer use.
What Is a Minimalist Desk Setup?
A minimalist desk setup is a workspace designed around simplicity, functionality, organization, and intentional use of space.
The basic principle is simple:
Keep what you need, organize what you use, and remove what you don't.
A minimalist desk may include:






However, there is no universal checklist.
Someone working as a programmer may need two or three monitors, while a writer may need only a laptop. A graphic designer may require a drawing tablet, while a student may need notebooks and textbooks.
Therefore, minimalist design is not about having the fewest objects possible.
It is about eliminating unnecessary objects while keeping the tools that support your work.
Why Create a Minimalist Desk Setup?
A clean workspace can make your working environment feel more organized and manageable.
1. Reduces Visual Clutter
When too many objects compete for your attention, your desk can feel chaotic.
Removing unnecessary items creates more visual space.
2. Makes Cleaning Easier
A desk with fewer objects is easier to dust, wipe, and maintain.
3. Improves Organization
When every important item has a designated place, you spend less time searching for things.
4. Creates More Working Space
Removing unused accessories, papers, and decorative items gives you more room for your computer, notebook, or other essential tools.
5. Creates a Professional Appearance
A clean desk can make a home office or professional workspace look more polished.
6. Makes Your Workspace More Comfortable
Good organization can reduce unnecessary reaching and movement while working.
However, a minimalist setup should not be treated as a guaranteed productivity solution. Your work habits, environment, schedule, and ergonomics also play important roles.
How to Create a Minimalist Desk Setup
Creating a minimalist desk does not have to happen overnight.
The easiest approach is to build your setup step by step.
Step 1: Remove Everything From Your Desk
Start with a clean surface.
Take everything off your desk and place the items somewhere nearby.
This gives you an opportunity to see how much you actually have.
Now divide everything into three groups:
Keep
Items you use regularly.
Store
Items you need occasionally but don't need on the desktop.
Remove
Items you no longer use.
This simple exercise can dramatically reduce unnecessary clutter.
Step 2: Identify Your Essential Desk Items
Before purchasing anything new, identify what you actually need.
For a basic computer workstation, the essentials may include:
Computer or laptop
Monitor
Keyboard
Mouse
Power accessories
Headphones
Desk lamp
You may also need:
Notebook
Pen
External storage
Microphone
Webcam
Drawing tablet
Phone stand
The exact list depends on your work.
The key is to avoid buying accessories simply because they look good in someone else's desk setup.
Step 3: Choose the Right Desk
Your desk is the foundation of your minimalist workspace.
Choose a desk based on your available space and daily requirements.
Consider:
Width
Depth
Height
Storage
Material
Stability
Cable-management options
A desk that is too small can become cluttered quickly.
A desk that is unnecessarily large may consume valuable room.
For most users, the ideal desk provides enough space for essential equipment while leaving some open working area.
Step 4: Keep the Desktop as Clear as Possible
One of the easiest minimalist desk setup rules is:
Don't use the desktop as permanent storage.
For example, avoid leaving these items scattered around:
Receipts
Packaging
Empty bottles
Random papers
Extra cables
Unused notebooks
Multiple pens
Old electronics
Unused accessories
Instead, create dedicated storage locations.
Use drawers, shelves, boxes, or organizers for things that don't need to remain on the desk.
Step 5: Organize Your Monitor
The monitor is often the largest object on a computer desk.
Position it carefully.
Your monitor should be comfortable to view without forcing you to constantly bend your neck.
A monitor stand or monitor arm can also help create additional space underneath the screen.
You can use the freed-up space for:
Keyboard storage
Notebook
Small accessories
Charging devices
For dual-monitor setups, keep the screens aligned and position the primary display according to your normal viewing direction.
Step 6: Use a Monitor Arm
A monitor arm can be particularly useful for a minimalist workstation.
Instead of keeping the monitor on a large stand, the arm attaches the monitor to the desk and allows you to adjust its position.
Depending on the model, you may be able to adjust:
Height
Tilt
Rotation
Distance
Orientation
One of the biggest advantages is the amount of desk space it can free.
However, a monitor arm isn't essential for every setup. If your existing monitor stand is compact and comfortable, keeping it may be the more minimalist choice.
Step 7: Hide Your Cables
Cable clutter is one of the biggest problems with otherwise clean desk setups.
Even an expensive desk can look messy if cables are hanging everywhere.
Start by identifying every cable.
Separate them into:
Power cables
Display cables
USB cables
Charging cables
Audio cables
Network cables
Then route them together where possible.
Useful cable-management solutions include:
Cable clips
Cable sleeves
Under-desk cable trays
Velcro cable ties
Cable boxes
Adhesive cable holders
Avoid permanently bundling cables that you frequently disconnect.
Good cable management should make your setup cleaner without making maintenance difficult.
Step 8: Create a Charging Station
Phones, earbuds, smartwatches, tablets, and other devices can quickly create cable clutter.
Instead of allowing charging cables to spread across your desk, create one dedicated charging area.
You could use:
A charging dock
A wireless charging stand
A cable organizer
A small charging shelf
Keep charging cables grouped together.
This makes your desk look cleaner and makes it easier to find the correct cable.
Step 9: Choose a Simple Desk Mat
A desk mat can make your setup look more cohesive while providing a smooth surface for your keyboard and mouse.
When choosing a desk mat, consider:
Size
Material
Cleaning requirements
Durability
Color
Surface texture
For a minimalist appearance, neutral colors such as black, gray, beige, white, or natural tones can work well.
However, choose a color that complements your room rather than following a trend blindly.
Step 10: Keep Desk Accessories Minimal
Accessories can improve functionality, but too many can defeat the purpose of minimalism.
Useful desk accessories may include:
Desk organizer
Monitor stand
Desk lamp
Headphone stand
Cable organizer
Small plant
Notebook
Pen holder
Before adding an accessory, ask:
Does this item solve a real problem?
If the answer is no, you probably don't need it.
Step 11: Use Vertical Space
One of the best ways to keep your desk clear is to use the space above and beside it.
Consider:
Wall shelves
Pegboards
Floating shelves
Monitor shelves
Vertical organizers
Vertical storage can keep frequently used items accessible without taking up valuable desktop space.
This is particularly useful for small desk setups.
Step 12: Choose Appropriate Lighting
Lighting is an important part of a comfortable workspace.
A minimalist desk setup doesn't require multiple decorative lights.
One well-positioned desk lamp may be enough.
You can also use:
Natural light
Ceiling lighting
Monitor lighting
Adjustable desk lamps
Indirect ambient lighting
Avoid placing a bright light directly behind your monitor if it creates distracting reflections.
Likewise, avoid working in a very dark room with only a bright monitor as your light source.
Step 13: Add One or Two Personal Elements
Minimalism does not mean removing all personality.
A completely empty desk can feel sterile.
Consider adding one or two personal elements, such as:
Small plant
Photo
Artwork
Small decorative object
Favorite notebook
Minimal clock
The key is moderation.
One meaningful item can have more visual impact than ten unrelated decorations.
Step 14: Create a Dedicated Storage System
Everything you keep should have a place.
For example:
Desk drawer:
Frequently used stationery.
Shelf:
Books and equipment.
Cable box:
Extra charging and electronic cables.
Storage box:
Occasionally used accessories.
File organizer:
Important documents.
This simple system prevents your desktop from becoming a storage area.

Minimalist Desk Setup for Small Spaces
You don't need a large room to create a minimalist workstation.
If space is limited, prioritize multifunctional equipment.
For example:
Use a laptop instead of a desktop computer if appropriate.
Use a monitor arm instead of a large monitor stand.
Use wall shelves instead of floor storage.
Use a compact keyboard.
Store accessories vertically.
Use an under-desk cable tray.
Keep only frequently used items on the desktop.
A small desk can still look spacious if the available surface is used efficiently.
Minimalist Desk Setup for Work From Home
A work-from-home workspace should balance aesthetics, productivity, comfort, and ergonomics.
A basic setup might include:
Comfortable desk
Ergonomic chair
Laptop or desktop
External monitor
Keyboard and mouse
Desk lamp
Headphones
Cable management
Small storage system
Keep work-related items organized and avoid allowing your desk to become a general-purpose storage area.
If possible, separate work equipment from personal items so that your workspace remains easier to manage.
Minimalist Desk Setup for Students
Students may need more physical materials than remote workers.
A practical student setup can include:
Laptop
Monitor
Keyboard and mouse
Notebook
Pens
Books
Desk lamp
Headphones
Small organizer
Instead of keeping every textbook on the desk, store books vertically on a nearby shelf.
Keep only the materials needed for the current study session on the desktop.
Minimalist Desk Setup for Gamers
A minimalist gaming setup can still include powerful hardware.
You don't have to remove gaming equipment simply to achieve a minimalist appearance.
Focus on:
Clean cable management
Limited decorative items
A simple desk
Monitor arm
Compact peripherals
Organized accessories
Controlled lighting
Instead of covering the desk with RGB accessories, use lighting strategically.
A clean gaming desk can look modern without being visually overwhelming.
Minimalist Dual Monitor Setup
Dual monitors can improve multitasking, but they can also dominate a desk.
To create a cleaner dual-monitor setup:
Use matching monitors when possible.
Align the top edges.
Use a dual-monitor arm.
Hide display cables.
Keep the keyboard centered.
Avoid placing unnecessary accessories between the monitors.
Use a consistent desktop background.
The goal is to make the monitors appear like one organized workstation rather than two separate devices.
Best Colors for a Minimalist Desk Setup
Color can strongly influence the appearance of a workspace.
Common minimalist color palettes include:
Black and White
A simple high-contrast combination that works well for modern setups.
Neutral Gray
A softer alternative to black and white.
Beige and Wood
Creates a warmer and more natural workspace.
White and Light Wood
Suitable for bright and airy interiors.
Black and Natural Wood
Combines a modern appearance with warmth.
You don't need to follow a specific color palette.
The important thing is consistency.
Try to limit your setup to a small number of complementary colors.
Minimalist Desk Setup Accessories You Actually Need
Not every desk accessory is essential.
A practical setup may include:
Essential
Keyboard
Mouse
Monitor
Desk mat
Power strip
Cable management
Useful
Monitor arm
Desk lamp
Headphone stand
Desk organizer
Charging station
Optional
Plant
Decorative object
LED lighting
Wall art
Clock
Before purchasing something, ask whether it improves your workspace or simply adds another object.
How to Keep Your Desk Clutter-Free
Creating a minimalist desk is only the beginning.
You also need a system for maintaining it.
Use the One-Minute Rule
If something can be put away in less than a minute, do it immediately.
End-of-Day Reset
Spend a few minutes at the end of your workday returning items to their proper places.
Digital Decluttering
A clean physical desk is useful, but your digital workspace matters too.
Organize:
Desktop files
Downloads
Browser bookmarks
Applications
Notifications
Cloud storage
Weekly Decluttering
Once a week, remove items that have accumulated unnecessarily.
Ask:
Did I use this during the last week?
If not, consider storing or removing it.
Common Minimalist Desk Setup Mistakes
Buying Too Many Accessories
A common mistake is purchasing products marketed as “must-have” desk accessories.
You don't need every trending accessory.
Sacrificing Ergonomics for Appearance
A beautiful desk isn't useful if your monitor is too low or your chair is uncomfortable.
Comfort should come before aesthetics.
Hiding Everything Without Organization
Putting everything into one drawer isn't organization.
Create logical storage categories.
Using Too Many Colors
Multiple colors can make an otherwise clean workspace look visually busy.
Choose a consistent palette.
Ignoring Cable Management
Visible cables can quickly make a minimalist setup look cluttered.
Copying Someone Else's Setup
A workspace that looks great in a photograph may not suit your needs.
Build your desk around your workflow.
Minimalist Desk Setup Checklist
Use this checklist when creating or redesigning your workspace:
Desk
Appropriate desk size
Comfortable height
Enough working space
Stable construction
Technology
Computer or laptop
Monitor
Keyboard
Mouse
Necessary peripherals
Organization
Cable management
Storage system
Desk organizer
Charging area
Comfort
Comfortable chair
Correct monitor position
Appropriate keyboard and mouse position
Suitable lighting
Aesthetics
Consistent color palette
Minimal decoration
Clean desktop
Personal touch
Maintenance
Daily reset
Weekly decluttering
Organized digital workspace
FAQs
What is a minimalist desk setup?
A minimalist desk setup is a workspace that focuses on simplicity, organization, functionality, and intentional use of space. It keeps essential equipment accessible while reducing unnecessary objects and visual clutter.
How do I make my desk look minimalist?
Start by removing unnecessary objects, organizing cables, using dedicated storage, keeping accessories to a minimum, and choosing a consistent color palette. Keep frequently used items accessible and store everything else.
What should be on a minimalist desk?
The ideal items depend on your work. A basic setup may include a computer or laptop, monitor, keyboard, mouse, desk mat, and lighting. Additional accessories should serve a specific purpose.
Is a minimalist desk setup better for productivity?
A clean and organized workspace can make it easier to find things and reduce visual distractions, but productivity depends on many factors. Your work habits, environment, comfort, and workflow also matter.
How do I hide cables on my desk?
Use cable clips, Velcro ties, cable sleeves, under-desk trays, cable boxes, and adhesive cable holders. Group related cables together and route them toward a common location.
How can I create a minimalist desk setup in a small room?
Choose a compact desk, use vertical storage, mount your monitor when practical, organize cables underneath the desk, and keep only frequently used items on the desktop.
Do I need a monitor arm for a minimalist desk?
No. A monitor arm can save space and improve adjustability, but it isn't essential. If your monitor stand is compact and comfortable, you can keep it.
What color is best for a minimalist desk setup?
There is no single best color. Black, white, gray, beige, and natural wood are popular minimalist choices. The most important factor is maintaining a consistent and uncluttered visual style.
How can I make my desk look aesthetic without cluttering it?
Choose one consistent color palette and add only a few intentional decorative elements. A small plant, desk lamp, artwork, or personal item can add character without overwhelming the workspace.
How often should I clean and organize my desk?
A quick reset at the end of each workday can prevent clutter from accumulating. A deeper organization and decluttering session once a week can help maintain the setup.
Can a gaming desk be minimalist?
Yes. A gaming desk can remain minimalist by limiting decorative items, organizing cables, using compact peripherals, managing RGB lighting carefully, and keeping the desktop free of unnecessary objects.
What is the difference between a minimalist desk and a simple desk?
A simple desk may have a basic design, while a minimalist desk setup is an intentional approach to reducing unnecessary items and organizing the workspace around functionality.
Conclusion
A minimalist desk setup is not about creating an empty desk.
It is about creating a workspace where everything has a purpose.
Start by removing unnecessary items. Then organize your essential equipment, manage your cables, choose appropriate storage, improve your lighting, and position your technology comfortably.
You don't need an expensive desk or a collection of premium accessories to create a clean workspace.
In many cases, the biggest improvement comes from simply removing things you don't use.
Remember the basic principle:
Less clutter. More function. Better organization.
Build your workspace around the way you actually work, study, create, or play. Keep essential items within reach, move occasional-use items into storage, and regularly reset your desk.
The result is a workspace that looks cleaner, feels more organized, and gives you the flexibility to focus on what matters.
Top 10 BOM Management Software for Businesses (2026)

iPhone 18 Series: Launch Date, Price, Features, Specifications & What’s New in 2026

Bistro vs Zepto Cafe vs Toing vs BK Cafe: Which One Is Better For You

What Is Courtroom AV? Complete Guide 2026

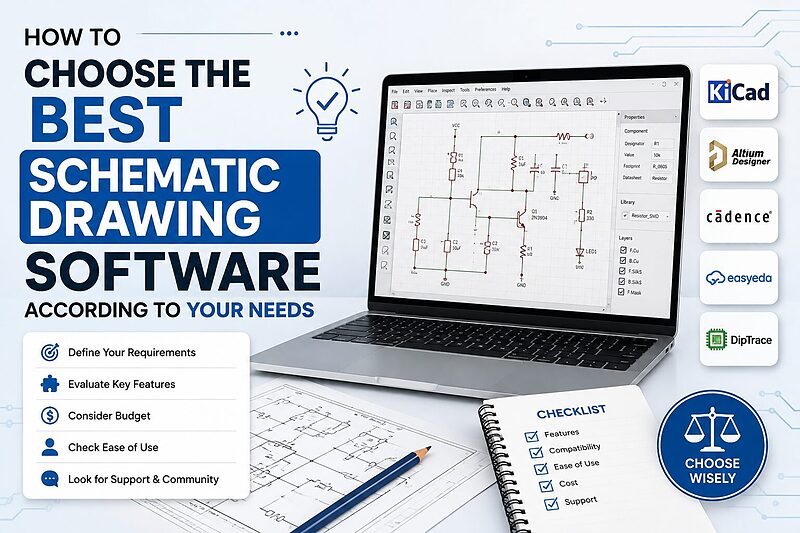
How To Choose The Best Schematic Drawing Software According To Your Needs
XTEN-AV vs Jetbuilt: Which AV Design Software Is Better in 2026?

Complete Guide to Field Service Management Software for AV Integrators

What to Do When Spirit Cancels Your Flight Last Minute: A Step-by-Step Guide

A Complete Guide to Handling Last-Minute Flight Cancellations
Field Service Management Software Implementation: Step-by-Step Guide, Best Practices, Costs, KPIs & ROI

Stylish Travel Bags for Men & Women: Complete Buying Guide

Carry Travel Bags: Types, Sizes, Features & Complete Buying Guide

Trendy Crossbody Bag: 15 Stylish Picks, Types, Features & Buying Guide

Gaming Table for PC: Complete Buying Guide, Sizes, Types, Features & Setup Ideas

Wall Mount Audio Visual (AV) Racks: Complete Guide to Types, Sizes, Installation & Best Practices
Modern audiovisual systems are becoming more sophisticated, compact, and network-driven. From corporate conference rooms and classrooms to healthcare facilities, hospitality venues, and residential home theaters, professional AV installations often require multiple processors, amplifiers, switches, control systems, power devices, and signal distribution components.
All of this equipment needs a secure, organized, and accessible location.
That is where wall mount AV racks come in.
A wall mount AV rack is a rack enclosure or mounting system designed to secure rack-mountable audiovisual and networking equipment against a wall or other vertical surface. Unlike traditional floor-standing racks, wall-mounted racks help conserve floor space while keeping AV equipment organized, protected, and accessible.
For AV integrators, system designers, IT professionals, and facility managers, choosing the right wall mount rack is more than a matter of equipment size. Rack capacity, depth, weight, ventilation, wall construction, cable management, security, accessibility, and future expansion all affect the reliability of the finished installation.
This guide explains everything AV professionals need to know about wall mount AV racks, including rack types, sizing, installation, thermal management, security, cable organization, applications, and selection criteria.
Key Takeaways
Wall mount AV racks provide secure, organized equipment housing while saving valuable floor space.
Most professional AV racks use the standard 19-inch rack format, allowing compatible equipment from different manufacturers to be installed in the same rack.
Rack size should be determined by rack units (U), equipment depth, weight, ventilation requirements, cable management, and future expansion.
Proper wall structure assessment is essential before installing a loaded wall mount rack.
Thermal management is critical because amplifiers, processors, switches, and other AV equipment can generate significant heat.
Enclosed, open-frame, and swing-frame racks serve different installation requirements.
Professional cable management improves system reliability, troubleshooting, appearance, and future upgrades.
Security features such as locking doors and secured rear panels are particularly important in public, educational, corporate, and high-value installations.
Selecting a rack with additional capacity can make future equipment upgrades significantly easier.
Modern wall mount AV racks can incorporate power distribution, ventilation, environmental monitoring, shelves, cable management, and other accessories.
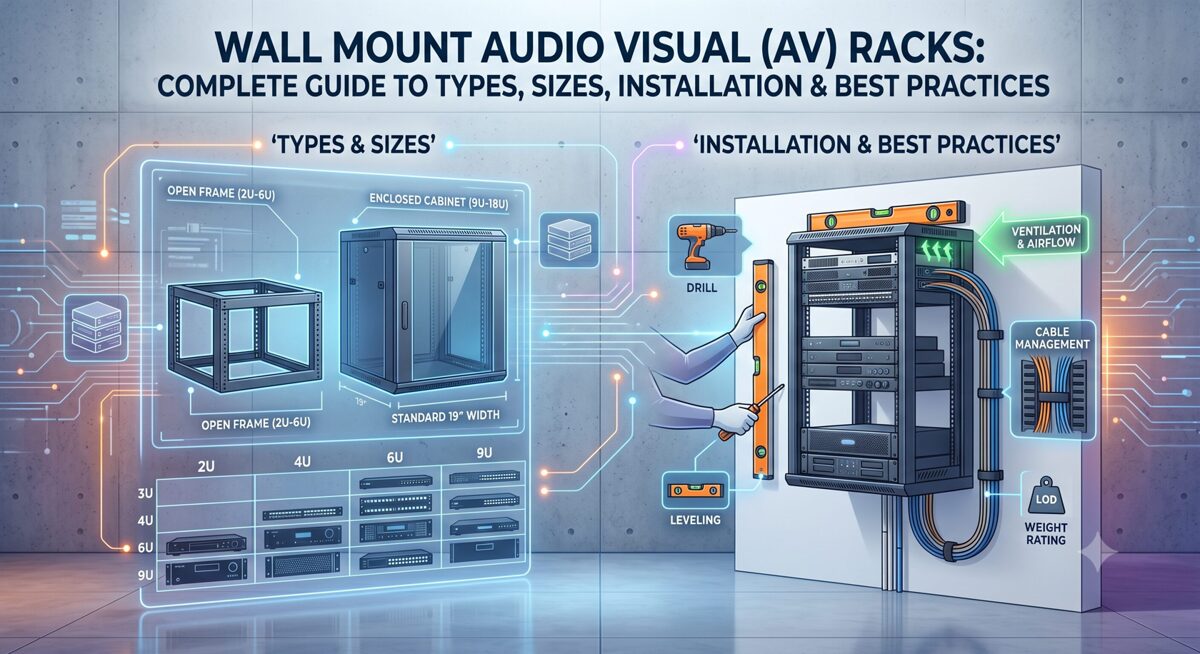
What Is a Wall Mount AV Rack?
A wall mount AV rack is a rack enclosure or mounting framework designed to hold audiovisual, networking, control, and related electronic equipment on a wall.
Most professional models are designed around the 19-inch rack standard, allowing compatible equipment to be secured using standardized mounting rails.
Typical equipment installed in a wall mount AV rack includes:
AV receivers
Audio amplifiers
Digital signal processors (DSPs)
Matrix switchers
Video processors
Network switches
Control processors
Patch panels
Power distribution units
Streaming devices
Media players
Wireless systems
Signal extenders
Automation equipment
Other rack-mountable electronics
Instead of placing this equipment on shelves, desks, floors, or inside improvised cabinets, a rack creates a standardized infrastructure platform.
This improves organization, accessibility, security, ventilation, and maintenance.
What Does "19-Inch Rack" Mean?
The term 19-inch rack refers to the standardized mounting width used by a large amount of professional electronic equipment.
The 19-inch measurement refers primarily to the rack's equipment mounting interface rather than the rack's overall external width.
Equipment height is measured in rack units, commonly written as U.
1U = 1.75 inches of vertical rack height
For example:
1U equipment = 1.75 inches high
2U equipment = 3.5 inches high
4U equipment = 7 inches high
8U equipment = 14 inches high
12U equipment = 21 inches high
This standardized approach allows different manufacturers' rack-mount equipment to be installed within the same infrastructure.
Why Are Wall Mount AV Racks Important?
A wall mount rack is not simply a container for AV equipment.
It is part of the infrastructure that supports system reliability and maintainability.
A well-designed rack installation can provide several benefits.
1. Saves Floor Space
One of the biggest advantages is space efficiency.
By moving AV equipment from the floor to the wall, installers can preserve valuable floor space in:
Conference rooms
Classrooms
Offices
Equipment closets
Hospitality spaces
Residential installations
Retail environments
This is especially useful where every square foot matters.
2. Improves Equipment Organization
Without a rack, AV equipment can become difficult to manage.
Cables may become tangled, power connections may be difficult to identify, and equipment may be stacked improperly.
A rack provides a structured environment where components can be mounted in a logical order.
3. Simplifies Maintenance
A properly organized rack allows technicians to identify equipment and connections more quickly.
Clear labeling, organized cable routing, and accessible equipment can reduce troubleshooting time.
4. Improves Equipment Protection
Enclosed wall mount racks can protect equipment from:
Dust
Accidental contact
Unauthorized access
Physical damage
Cable interference
5. Supports Better Cable Management
Wall mount racks provide dedicated locations for vertical and horizontal cable management accessories.
This helps keep signal, network, control, and power cables organized.
6. Supports Professional Installation Standards
A structured rack installation creates a more professional infrastructure solution than placing equipment loosely on shelves or furniture.

Types of Wall Mount AV Racks
Wall mount AV racks are available in several configurations. The right design depends on the equipment, environment, security requirements, accessibility needs, and thermal load.
1. Open-Frame Wall Mount Racks
Open-frame racks consist primarily of mounting rails and a supporting frame without fully enclosed doors or panels.
Advantages
Excellent natural airflow
Easy equipment access
Easy cable routing
Lower weight
Often lower cost
Simple equipment visibility
Open-frame racks can work well in controlled technical environments such as:
Equipment closets
Server rooms
Back-of-house areas
Utility spaces
Controlled-access technical rooms
Limitations
They provide less protection against:
Dust
Accidental contact
Unauthorized access
Environmental exposure
For public-facing installations, an enclosed rack may be more appropriate.
2. Enclosed Wall Mount AV Racks
Enclosed racks use doors and panels to protect installed equipment.
Depending on the model, an enclosure may include:
Front doors
Rear access panels
Side panels
Ventilation openings
Locks
Adjustable rails
Cable entry points
Advantages
Enclosed wall mount racks can provide:
Better equipment protection
Improved security
Dust reduction
Cleaner appearance
Better physical organization
Reduced accidental contact
They are commonly appropriate for corporate, educational, residential, hospitality, and public-facing environments.
Door Options
Different door designs serve different purposes.
Solid doors provide greater physical protection and can help reduce equipment noise but may restrict airflow.
Perforated doors provide ventilation while maintaining enclosure and security.
Glass or transparent doors allow technicians to visually inspect equipment while keeping the system enclosed.
The correct door configuration depends on the installation's security, airflow, acoustic, and visibility requirements.
3. Swing-Frame Wall Mount Racks
Swing-frame racks use a hinged or pivoting design that allows the rack assembly to move away from the wall.
This can make rear equipment access much easier.
Swing-frame racks are particularly useful when technicians need regular access to:
Rear connectors
Network ports
Audio connections
Control wiring
Power connections
Diagnostic interfaces
They can be valuable in professional AV environments where maintenance access is a major consideration.
Important Consideration: Weight
Swinging a loaded rack changes the forces applied to the mounting structure.
Therefore, installers must follow the manufacturer's specified:
Maximum equipment load
Mounting requirements
Hardware requirements
Swing clearance
Structural requirements
The wall and mounting hardware must be capable of supporting the rack safely in both its normal and extended positions.

How to Choose the Right Wall Mount AV Rack
Choosing a wall mount AV rack should start with the equipment list rather than the rack itself.
The most important factors include:
Rack unit capacity
Equipment depth
Weight capacity
Ventilation
Wall structure
Cable management
Security
Accessibility
Power requirements
Future expansion
Let's examine each one.
1. Calculate Rack Unit Capacity
Start by creating a complete equipment inventory.
Record the rack height of every component.
For example:
| Equipment | Rack Height |
|---|---|
| Network switch | 1U |
| DSP | 1U |
| Matrix switcher | 2U |
| Amplifier | 2U |
| Power distribution | 1U |
| Cable management | 1U |
The total is:
8U
However, an 8U rack may not be the best choice.
You also need to consider:
Cable management
Ventilation
Equipment spacing
Future equipment
Accessories
Service access
For many installations, choosing additional capacity provides more flexibility.
Practical Rule
If your current equipment requires 8U, consider a larger rack if future expansion is expected.
Avoid selecting a rack that is already nearly full on day one.
2. Check Equipment Depth
Rack height is only one dimension.
Equipment depth is equally important.
Some AV devices are shallow, while amplifiers and other equipment can be significantly deeper.
Before selecting a rack, check:
Equipment chassis depth
Connector clearance
Cable bend radius
Rear ventilation requirements
Door clearance
Rail adjustment range
The usable internal depth of the rack should be greater than the equipment's physical depth.
Allow additional room for cables and connectors.
A rack door that technically closes but places excessive pressure on cables is not a properly sized rack.
3. Evaluate Weight Capacity
Every wall mount rack has a specified load rating.
Calculate the total installed equipment weight, including:
AV equipment
Amplifiers
Network equipment
Power distribution
Shelves
Accessories
Cable bundles
Do not consider equipment weight alone.
The wall itself must also be capable of supporting the complete installed load.
For heavier installations, a structural assessment may be necessary.
4. Consider Thermal Management
Thermal management is one of the most important considerations when designing a wall mount AV rack.
AV equipment generates heat during operation.
Examples include:
Power amplifiers
Network switches
DSPs
Video processors
Matrix switchers
Power equipment
If heat cannot escape effectively, internal equipment temperatures may rise.
Excessive heat can contribute to:
Thermal shutdown
Reduced performance
Fan noise
Component degradation
Shortened equipment life
Unexpected system failures
Passive vs. Active Rack Ventilation
Passive Ventilation
Passive ventilation uses:
Perforated doors
Ventilation openings
Vented side panels
Natural convection
It can be appropriate for lower-density installations with manageable heat loads.
A common airflow principle is:
Cool air enters lower areas and warmer air exits through upper areas.
However, actual ventilation requirements should be based on the equipment manufacturer's specifications and the rack's environmental conditions.
Active Ventilation
Active ventilation uses fans to move air through the enclosure.
Fan systems may be necessary when:
Equipment density is high
Heat output is significant
The enclosure is tightly packed
Ambient temperatures are high
Natural convection is insufficient
Fan noise should also be considered when the rack is installed near people.
For conference rooms, classrooms, offices, and residential spaces, unnecessarily loud fans can become a usability problem.
5. Think About Future Expansion
A rack should support today's equipment without making tomorrow's upgrade difficult.
Future requirements may include:
Additional network switches
More DSP equipment
New video distribution hardware
Additional amplifiers
Control processors
Streaming equipment
Power management
Monitoring equipment
Leaving expansion capacity can reduce the need to replace the rack later.
6. Evaluate Security Requirements
Security requirements vary depending on the environment.
A rack in a locked equipment room may not need the same security features as a rack installed in a classroom or public area.
Potential security features include:
Lockable front doors
Lockable rear panels
Security fasteners
Tamper-resistant hardware
Electronic access control
Access monitoring
For high-value installations, security should be treated as part of the overall system design rather than an afterthought.
Wall Mount AV Rack Installation Guide
Correct installation is essential.
Even a high-quality rack can become unsafe if it is mounted incorrectly.
Step 1: Identify the Wall Structure
Before drilling, determine whether the wall is:
Wood stud construction
Metal stud construction
Concrete
Masonry
Hollow wall construction
Another structural system
Do not assume that drywall alone can support a loaded AV rack.
The rack should be attached to suitable structural members or an appropriately engineered mounting system.
Step 2: Determine the Total Load
Calculate:
Rack weight + equipment weight + accessories + cable weight
The mounting system must safely support the complete load.
For larger or critical installations, structural engineering input may be appropriate.
Step 3: Select Appropriate Mounting Hardware
The mounting hardware must match the wall construction.
Potential solutions can include:
Structural screws
Lag screws
Toggle anchors
Concrete anchors
Masonry anchors
Reinforced mounting plates
Other manufacturer-approved hardware
The correct fastener depends on the wall material and expected load.
Never select anchors based only on convenience.
Step 4: Mark and Level the Rack
A rack should be accurately positioned before final fastening.
Use a suitable level to confirm:
Horizontal alignment
Vertical alignment
Mounting plate position
An improperly aligned rack can create mechanical stress and make equipment installation more difficult.
Step 5: Secure the Rack
Install the required mounting hardware according to the manufacturer's instructions.
Fasteners should be properly tightened without over-tightening.
For installations with significant vibration or heavy equipment, verify the mounting system after loading the rack.
Step 6: Install Equipment Strategically
Equipment placement matters.
A practical approach is to place heavier equipment lower in the rack.
For example:
Heavy amplifiers → lower positions
Network equipment → middle positions
Lightweight processors → upper positions
This can help improve load distribution and simplify maintenance.
Heat-producing equipment should also be positioned with adequate airflow.
Step 7: Plan Cable Routing
Install cable management before the rack becomes overcrowded.
Consider separate pathways for:
Power
Audio
Video
Network
Control
Antenna/RF
Other low-voltage signals
Where appropriate, maintain separation between power and signal cables to reduce potential interference and simplify troubleshooting.
Cable Management Best Practices for Wall Mount AV Racks
Cable management is one of the clearest differences between a temporary installation and a professional AV infrastructure system.
Good cable management should provide:
Organization
Accessibility
Strain relief
Identification
Serviceability
Expansion capacity
Use Vertical Cable Management
Vertical channels provide organized pathways along the sides or rear of the rack.
They are useful for managing large cable bundles.
Use Horizontal Cable Management
Horizontal panels can be installed between equipment sections.
Common options include:
D-rings
Brush panels
Finger ducts
Cable pass-through panels
Label Both Ends
Every important cable should be identifiable at both ends.
A good labeling system can significantly reduce troubleshooting time.
Labels should be:
Clear
Consistent
Durable
Easy to read
Leave Service Loops
Avoid pulling cables excessively tight.
Service loops provide additional cable length for:
Equipment replacement
Maintenance
Reconfiguration
Troubleshooting
Avoid Overcrowding
A rack should never be treated as a place to fit as many cables as physically possible.
Overcrowding can:
Restrict airflow
Increase cable stress
Make maintenance difficult
Complicate upgrades
Advanced Features in Modern Wall Mount AV Racks
Modern racks can offer much more than basic equipment mounting.
Integrated Power Distribution
Rack-mounted power distribution units can provide organized power delivery to multiple devices.
Depending on the model, features may include:
Multiple outlets
Circuit protection
Surge protection
Remote monitoring
Current monitoring
Switched outlets
The PDU should always be selected according to the electrical requirements of the installation.
Environmental Monitoring
Advanced AV installations may benefit from monitoring:
Temperature
Humidity
Power consumption
Door access
Rack conditions
Monitoring can help identify problems before they cause equipment failure.
For distributed AV systems, remote monitoring can be particularly valuable because technicians may not need to physically inspect every rack to identify an environmental problem.
Adjustable Mounting Rails
Adjustable rails provide greater equipment compatibility.
They allow installers to position mounting rails according to different equipment depths.
This is particularly useful when a single rack contains equipment from multiple manufacturers with different chassis dimensions.
Shelves and Adapter Plates
Not every device is rack-mountable.
Shelves and adapter brackets can accommodate:
Media players
Small computers
Consumer electronics
Control devices
Legacy equipment
Specialized hardware
This allows non-rack equipment to be incorporated into an organized professional rack system.
Wall Mount AV Rack Applications
Wall mount AV racks are used across a wide range of professional environments.
Corporate Conference Rooms
Corporate conference rooms commonly use racks to house:
Video conferencing equipment
DSPs
Network switches
Matrix switchers
Control processors
Power equipment
Wall mounting helps preserve floor space while keeping equipment organized.
Educational Facilities
Schools, colleges, universities, and training centers use AV racks for:
Classroom AV
Lecture halls
Video distribution
Digital signage
Audio systems
Distance learning
Campus networking
Security is particularly important because equipment may be installed in areas accessible to students and staff.
Healthcare Facilities
Healthcare applications can include:
Patient entertainment
Digital signage
Telemedicine
Video distribution
Surgical video systems
Clinical AV infrastructure
Healthcare installations can involve additional environmental, security, reliability, and compliance considerations.
Critical systems should be designed according to the applicable facility and regulatory requirements.
Hospitality
Hotels, resorts, conference centers, and entertainment venues often use distributed AV systems.
Wall mount racks can house equipment for:
Background music
Digital signage
Television distribution
Conference rooms
Entertainment systems
Networked AV
Standardizing rack configurations across multiple locations can simplify maintenance.
Residential AV and Home Theater
High-end residential installations can also benefit from professional wall mount racks.
Applications include:
Home theaters
Whole-house audio
Video distribution
Smart home control
Network infrastructure
Media systems
In residential applications, noise management can be particularly important.
Fan systems and equipment placement should be selected with occupant comfort in mind.
Wall Mount AV Rack Maintenance Checklist
Regular maintenance helps protect equipment and extend system life.
Monthly or Periodic Checks
Inspect rack mounting points
Check equipment mounting screws
Inspect cable connections
Check for excessive dust
Verify ventilation openings
Look for abnormal fan noise
Check for unusual heat
Quarterly Checks
Depending on the environment:
Clean ventilation openings
Clean fan filters
Inspect cable organization
Verify equipment temperatures
Check rack doors and locks
Annual Checks
A comprehensive inspection can include:
Structural inspection
Mounting hardware inspection
Equipment inspection
Cable documentation updates
Rack capacity review
Thermal performance assessment
Power distribution review
Security feature testing
Maintenance frequency should increase in dusty, hot, humid, or high-use environments.

Common Wall Mount AV Rack Mistakes to Avoid
Mistake 1: Choosing the Rack Before the Equipment
Always create the equipment list first.
Mistake 2: Ignoring Equipment Depth
A rack can have enough U capacity but still be too shallow.
Mistake 3: Underestimating Heat
High-density AV equipment can generate significant heat.
Mistake 4: Mounting to Weak Wall Material
The rack must be supported by an appropriate structural system.
Mistake 5: Filling Every Rack Unit
Leave room for cable management, ventilation, and future expansion.
Mistake 6: Poor Cable Labeling
Unlabeled cables make future maintenance unnecessarily difficult.
Mistake 7: Ignoring Rear Access
Equipment with rear connections requires a realistic maintenance strategy.
Mistake 8: Overlooking Security
Public or accessible environments may require lockable enclosures.
Mistake 9: Ignoring Noise
Fans and equipment can create unwanted noise in occupied spaces.
Mistake 10: Treating Installation as an Afterthought
Rack selection, wall structure, ventilation, power, and cable management should be considered during system design—not after equipment arrives.
How to Specify a Wall Mount AV Rack
A professional AV rack specification should document more than rack size.
A useful specification can include:
Rack type: Enclosed / open-frame / swing-frame
Rack capacity: XXU
Equipment depth: XX inches
Load requirement: XX lb/kg
Mounting surface: Wood stud / metal stud / concrete / masonry
Door: Solid / perforated / transparent
Ventilation: Passive / active
Security: Lockable / standard
Cable management: Vertical + horizontal
Power: Rack-mounted PDU
Future capacity: XX%
Accessories: Shelves / panels / fans / monitoring
This approach helps ensure that the rack specification matches the overall AV system design.
Wall Mount AV Rack vs. Floor-Standing Rack
| Feature | Wall Mount AV Rack | Floor-Standing Rack |
|---|---|---|
| Floor-space efficiency | Excellent | Lower |
| Large equipment capacity | Limited to moderate | Excellent |
| Installation | Requires suitable wall structure | Floor-supported |
| Accessibility | Depends on design | Generally easier |
| Distributed AV systems | Excellent | Good |
| Heavy equipment | Requires careful structural planning | Generally easier |
| Small installations | Excellent | Often excessive |
| Security | Available with enclosed models | Available |
| Cable management | Excellent | Excellent |
| Expansion | Depends on rack size | Usually greater |
The choice depends on the project's equipment, available space, structural conditions, maintenance requirements, and future expansion plans.
Frequently Asked Questions About Wall Mount AV Racks
What is a wall mount AV rack?
A wall mount AV rack is a wall-mounted enclosure or mounting framework designed to house professional audiovisual, networking, control, and related electronic equipment. Most models use standardized rack mounting dimensions and are available in open-frame, enclosed, or swing-frame configurations.
What size wall mount AV rack do I need?
Determine the required rack size by adding the rack-unit height of all equipment, then allowing additional space for cable management, ventilation, accessories, and future expansion. Equipment depth and total weight should also be checked before selecting the rack.
How many inches is 1U in an AV rack?
One rack unit, or 1U, equals 1.75 inches of vertical equipment height.
Can a wall mount AV rack hold an amplifier?
Yes, provided the rack has sufficient depth, rack-unit capacity, ventilation, and weight capacity for the amplifier. Because amplifiers can generate significant heat and may be relatively heavy, thermal management and structural support should receive particular attention.
Can I install a wall mount AV rack on drywall?
A wall mount rack should not rely on unsupported drywall alone when carrying significant equipment loads. The rack should be attached to appropriate structural members or an engineered mounting system using hardware suitable for the wall construction and expected load.
Do wall mount AV racks need ventilation?
Many installations do. The required ventilation depends on the equipment's heat output, rack design, ambient temperature, enclosure configuration, and manufacturer requirements. Passive ventilation may be sufficient for some systems, while high-density installations may require active fan-based cooling.
What is the difference between an open-frame and enclosed AV rack?
An open-frame rack provides easy access and excellent airflow but offers limited protection and security. An enclosed rack provides greater protection, security, and a cleaner appearance but requires more careful thermal management.
Are swing-frame AV racks worth it?
Swing-frame racks can be valuable when frequent rear access is required. They allow technicians to reach rear connections without completely removing the rack from the wall. However, the rack, wall structure, and mounting hardware must be rated for the installed load and swing-out configuration.
How should equipment be arranged inside an AV rack?
A common approach is to place heavier equipment toward the lower portion of the rack, organize equipment logically, provide adequate ventilation, and leave appropriate space for cable management and service access. The manufacturer's installation and ventilation requirements should always take priority.
How much space should I leave for future expansion?
There is no universal percentage that applies to every project, but designing additional capacity into the rack can make future upgrades easier. The amount should be based on the client's roadmap, expected technology changes, equipment density, and available installation space.
How do I improve cable management in a wall mount rack?
Use vertical and horizontal cable management, label cables at both ends, maintain appropriate service loops, separate power and signal pathways where appropriate, and avoid excessive cable bundling that restricts airflow or creates connector stress.
How often should a wall mount AV rack be maintained?
Maintenance frequency depends on the environment and equipment. Periodic inspections should check mounting hardware, ventilation, fans, cables, equipment temperatures, and security features. Dusty or high-use environments may require more frequent cleaning and inspection.
Wall Mount AV Rack Selection Checklist
Before purchasing or specifying a wall mount AV rack, verify the following:
Equipment
Complete equipment inventory created
Rack-unit requirements calculated
Equipment depth verified
Connector clearance verified
Equipment weight calculated
Future equipment considered
Rack
Rack capacity confirmed
Load rating confirmed
Rail configuration verified
Door type selected
Security requirements addressed
Cable entry points confirmed
Thermal
Equipment heat output reviewed
Passive ventilation evaluated
Active cooling considered where necessary
Fan noise considered
Ambient temperature reviewed
Installation
Wall construction identified
Structural mounting points confirmed
Correct anchors selected
Rack position measured
Rack leveled
Mounting hardware installed correctly
Cable Management
Vertical management planned
Horizontal management planned
Cable labels prepared
Service loops included
Power and signal routing considered
Maintenance
Rear access strategy defined
Equipment documentation created
Cable documentation created
Maintenance schedule established
Future expansion strategy considered
Conclusion
Wall mount AV racks are an important part of professional audiovisual infrastructure. They provide a structured way to secure, organize, protect, cool, and maintain AV equipment while minimizing the amount of floor space required.
The right rack, however, is not simply the one with enough rack units.
AV professionals need to evaluate the complete installation environment, including equipment dimensions, rack capacity, depth, weight, ventilation, wall construction, cable management, security, accessibility, power, and future expansion.
For smaller distributed AV systems, an open-frame or compact enclosed rack may provide the ideal balance between accessibility and space efficiency. For public or security-sensitive environments, an enclosed locking cabinet may be more appropriate. Where frequent rear access is required, a swing-frame design can simplify maintenance.
Thermal management should also be treated as a core design requirement. High-density equipment can generate substantial heat, making ventilation, equipment spacing, airflow direction, and active cooling important considerations.
Installation quality is equally important. A properly specified rack can still become a safety or reliability problem if it is mounted to an unsuitable wall, loaded beyond its rating, poorly ventilated, or inadequately organized.
As AV systems continue moving toward higher equipment density, network-based architectures, distributed processing, remote monitoring, and integrated control, rack infrastructure will become increasingly important.
For AV integrators, system designers, IT professionals, facility managers, and technology decision-makers, understanding wall mount AV rack fundamentals helps create installations that are safer, easier to maintain, more scalable, and more reliable.
Ultimately, a professional AV system is only as dependable as the infrastructure supporting it. A well-designed wall mount AV rack provides that infrastructure by bringing together equipment protection, organization, thermal management, security, cable management, and serviceability in a single installation solution.

Training Room AV Design Guide: How to Design a High-Performance Learning Space
A well-designed training room AV system does more than display presentations and play audio. It creates a reliable learning environment where every participant can clearly see, hear, interact with, and understand training content.
The right training room AV design combines displays, projectors, speakers, microphones, cameras, control systems, connectivity, lighting, and room acoustics into a coordinated system. The goal is not simply to install the most advanced equipment, but to select technology based on the room's size, seating layout, viewing distance, audience capacity, training format, and operational requirements.
For example, a small classroom may only require a commercial display, soundbar, wireless presentation system, and simple control panel. A large corporate training room may need multiple displays, distributed speakers, wireless microphones, cameras, automated switching, room scheduling, and centralized AV control.
A successful training room AV design therefore starts with the learning experience and room requirements, not individual equipment specifications.
This guide explains how to plan a training room AV system, choose the right displays and audio equipment, design control systems, avoid common mistakes, and create an AV environment that is scalable, accessible, reliable, and easy to operate.
Key Takeaways
Start training room AV design with room size, seating capacity, viewing distance, and training requirements.
Choose displays based on screen size, viewing distance, resolution, brightness, and room lighting.
Use projectors when very large images or flexible screen placement are important.
Design audio for speech intelligibility rather than simply maximizing volume.
Microphone selection should match the instructor's movement and training format.
A centralized control system can simplify displays, audio, source selection, lighting, and conferencing.
Room acoustics can significantly affect speech clarity and conferencing performance.
Provide appropriate wired and wireless connectivity for presenters and participants.
Design for accessibility, including captions, hearing assistance, clear sightlines, and intuitive controls.
Document the system and train users before deployment.
Test the complete AV workflow under realistic operating conditions.
Plan for maintenance, future expansion, software updates, and equipment replacement.
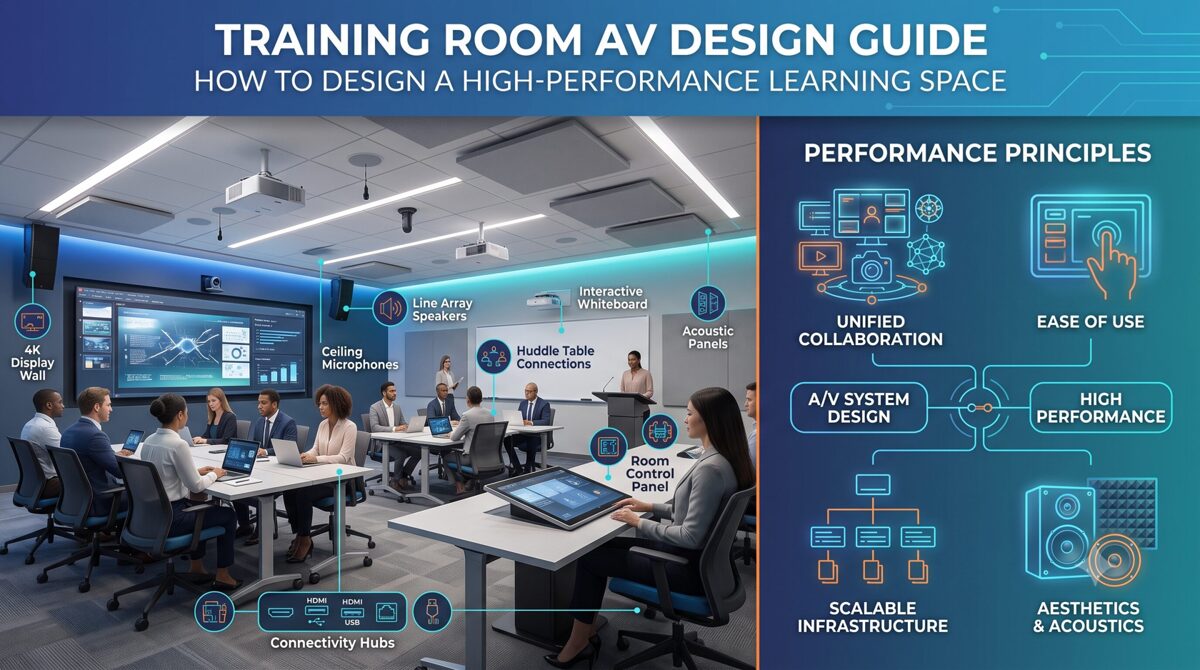
What Is Training Room AV Design?
Training room AV design is the process of planning and integrating audiovisual technologies to support teaching, presentations, collaboration, communication, and remote participation within a training environment.
A complete training room AV system can include:
Displays
Projectors
Projection screens
Speakers
Amplifiers
Digital signal processors
Wireless microphones
Wired microphones
Cameras
Video conferencing equipment
Presentation systems
HDMI and USB connectivity
Network infrastructure
AV-over-IP systems
Control processors
Touch panels
Room scheduling systems
Lighting controls
Acoustic treatments
The exact equipment depends on the room and its intended use.
Why Training Room AV Design Matters
Poor AV design can create problems even when high-quality equipment has been installed.
Common issues include:
Participants unable to read presentation content
Inconsistent audio levels
Microphone feedback
Poor speech intelligibility
Screen glare
Complicated controls
Incompatible presentation devices
Camera framing problems
Cable clutter
Insufficient connectivity
Poor acoustics
Difficult troubleshooting
A properly engineered system addresses these issues before installation.
How to Assess a Training Room Before AV Design
Before selecting equipment, conduct a training room AV site assessment.
The assessment should document the physical room, technology requirements, and expected user experience.
1. Room Dimensions
Record:
Room length
Room width
Ceiling height
Wall dimensions
Window locations
Door locations
Available mounting surfaces
These measurements influence display placement, speaker positioning, projector selection, and cable routing.
2. Seating Capacity
Determine the maximum number of participants.
A room designed for 12 people has very different AV requirements from a training facility designed for 100 people.
Consider:
Number of seats
Seating arrangement
Instructor location
Participant sightlines
Viewing distance
Accessibility requirements
3. Seating Layout
Common layouts include:
Classroom
Theater
Boardroom
U-shape
Conference
Cluster
Flexible/movable seating
The seating configuration can affect display positioning and speaker coverage.
4. Training Format
Ask how the room will actually be used.
For example:
Instructor-led training
Corporate presentations
Product demonstrations
Software training
Hybrid learning
Remote training
Video playback
Collaborative workshops
Certification sessions
Executive presentations
The AV system should be designed around these use cases.
Choosing the Right Displays for a Training Room
Display selection is one of the most important parts of training room AV design.
The primary options are:
Flat-panel displays
Large-format commercial displays
LED displays
Projectors and projection screens
Flat-Panel Displays
Commercial displays are often effective for small and medium-sized training rooms.
Advantages include:
High image quality
Strong brightness
Easy installation
Low maintenance
Good performance in bright rooms
Simple source connectivity
However, one display may not provide sufficient viewing size for a large room.
LED Displays
Direct-view LED can be appropriate for larger training environments where a very large image is required.
Potential advantages include:
Large screen sizes
High brightness
Excellent visibility
Flexible aspect ratios
Strong visual impact
The trade-offs can include higher installation costs, more complex infrastructure, and greater system engineering requirements.
Projectors
Projectors remain useful when the training room requires a large image but a large direct-view display is impractical.
They can be appropriate for:
Large training rooms
Auditoriums
Flexible spaces
Large presentation environments
However, projector selection requires careful consideration of:
Brightness
Throw distance
Lens
Screen size
Screen gain
Ambient light
Resolution
Mounting location
For projector-specific planning, a Projector Screen Size Calculator can help determine screen dimensions based on diagonal size and aspect ratio.
How to Choose the Right Screen Size
The correct display size depends on more than room dimensions.
Consider:
Furthest viewing position
Closest viewing position
Content type
Font size
Image detail
Room lighting
Screen resolution
Seating arrangement
Training rooms often display text-heavy content, spreadsheets, diagrams, software interfaces, and instructional videos.
Therefore, the display should allow participants at the back of the room to comfortably read important information.
For detailed screen calculations, a Screen Dimension Calculator can help determine width, height, diagonal, and aspect ratio.
Display Size Is Not the Same as Resolution
A large screen does not automatically produce a better viewing experience.
Consider both:
Physical screen size + resolution + viewing distance + content type
A display that is technically high-resolution may still be unsuitable if text is too small for participants sitting far away.
Training Room Audio Design
Audio is arguably one of the most important parts of a training room AV system because training depends heavily on speech.
The objective is not simply to make the room loud.
The objective is to provide clear, consistent, intelligible speech throughout the seating area.
A training room audio system may include:
Ceiling speakers
Wall-mounted speakers
Pendant speakers
Soundbars
Amplifiers
Digital signal processors
Wireless microphones
Boundary microphones
Lavalier microphones
Headset microphones
Speaker Placement
Speaker placement should provide consistent coverage across the audience.
Avoid designing a system where participants sitting near the speaker hear dramatically more volume than participants at the back.
The acoustic characteristics of the room should also be considered.
Speech Intelligibility
Speech intelligibility is especially important for:
Instructor-led training
Video conferencing
Remote learning
Technical demonstrations
Compliance training
Presentations
Room acoustics, speaker placement, microphone selection, processing, and background noise all affect intelligibility.
Choosing Training Room Microphones
Microphone selection should reflect how instructors and participants interact.
Lavalier Microphones
Lavalier microphones are useful when instructors need hands-free operation.
They work well for:
Lectures
Demonstrations
Instructor-led training
Presentations
Headset Microphones
Headsets can provide consistent microphone positioning and are useful when instructors move around frequently.
Handheld Microphones
Handheld microphones are useful for:
Q&A
Audience participation
Panel discussions
Events
Boundary Microphones
Boundary microphones can be useful for collaborative tables and conferencing applications.
Wireless vs Wired Microphones
Wireless microphones provide mobility but introduce additional considerations such as:
Battery management
RF coordination
Wireless interference
Charging
Security
Maintenance
A professional training room should include an operational plan for microphone batteries and spares.
Video Conferencing for Hybrid Training Rooms
Modern training environments increasingly need to support participants who are not physically present.
A hybrid training room may require:
PTZ camera
Instructor camera
Audience camera
USB connectivity
Video conferencing platform integration
Echo cancellation
Microphone array
Speaker system
Content sharing
Automatic camera tracking
Camera Positioning
Camera placement should provide a useful view of the instructor, presenter, participants, or training activity.
Consider:
Camera height
Viewing angle
Lighting
Background
Field of view
Participant seating
Avoid positioning the camera where windows or bright lights create strong backlighting.
Training Room AV Control Systems
A control system connects the different AV components into an easier-to-use interface.
Instead of requiring users to operate multiple remote controls, a centralized interface can provide common functions such as:
System power
Display selection
Source selection
Volume control
Microphone control
Presentation sharing
Video conferencing
Screen control
Lighting
Room presets
Why AV Control Matters
A technically sophisticated AV system can still fail operationally if users cannot understand how to use it.
The best training room control interface should be:
Simple
Consistent
Clearly labeled
Responsive
Accessible
Easy to troubleshoot
One-Touch Room Presets
Useful presets may include:
Training Mode
Display on
Presentation source selected
Microphone enabled
Standard lighting
Video Conference Mode
Camera activated
Microphones enabled
Conference source selected
Display configured
Presentation Mode
Presenter source selected
Appropriate display configuration
Audio enabled
These presets reduce the number of steps required from instructors.
Connectivity and Signal Distribution
A training room should support the devices presenters are likely to bring.
Common interfaces include:
HDMI
USB-C
USB
DisplayPort
Wireless presentation
Network connectivity
HDMI and USB-C
HDMI remains common for video distribution, while USB-C is increasingly important for modern laptops.
When designing connectivity, consider:
Cable length
Signal resolution
Connector compatibility
Adapters
Charging requirements
Cable management
Wireless Presentation
Wireless presentation systems can reduce cable clutter and allow presenters to share content from compatible devices.
However, network configuration, security, compatibility, and user authentication should be considered during design.
Room Acoustics and Lighting
AV equipment cannot compensate completely for poor room conditions.
Acoustics
Consider:
Reverberation
Hard reflective surfaces
HVAC noise
Outside noise
Room geometry
Acoustic treatment
Acoustic treatment can improve speech clarity and reduce unwanted reflections.
Lighting
Lighting affects both local presentations and video conferencing.
Consider:
Screen glare
Ambient light
Window placement
Instructor lighting
Camera exposure
Dimmable lighting
A good training room should provide enough illumination for participants to take notes while maintaining suitable screen visibility.
Accessibility in Training Room AV Design
Accessibility should be part of AV planning rather than an afterthought.
Depending on the environment, consider:
Closed captions
Assistive listening systems
Accessible control interfaces
Appropriate screen placement
Clear sightlines
Hearing assistance
Accessible seating
Adjustable microphones
Clear visual indicators
Training content should also be designed so that participants can access important information through appropriate visual and audio channels.
AV-over-IP and Scalable Training Room Systems
Larger organizations may benefit from network-based AV distribution.
AV-over-IP can allow video and audio signals to travel across a network infrastructure rather than relying exclusively on traditional point-to-point cabling.
Potential benefits include:
Scalability
Centralized management
Flexible routing
Multi-room distribution
Remote monitoring
Easier expansion
However, AV-over-IP introduces additional requirements involving network design, bandwidth, configuration, security, and IT collaboration.
For larger deployments, AV and IT teams should work together during the design stage.
Training Room AV Design Best Practices
A reliable system should follow a structured design process.
1. Start With User Requirements
Understand how instructors and participants will use the room.
2. Design Around the Audience
Prioritize visibility and speech intelligibility.
3. Keep Controls Simple
Reduce unnecessary complexity.
4. Plan for Multiple Devices
Support the devices presenters actually use.
5. Design for Hybrid Learning
Consider remote participants when appropriate.
6. Test Under Real Conditions
Evaluate the system with realistic seating, lighting, content, and presenter movement.
7. Document Everything
Maintain:
System diagrams
Equipment lists
Cable schedules
Configuration information
User guides
Maintenance records
8. Plan for Future Expansion
Avoid designing a system that becomes obsolete as soon as the organization adds another display, room, or conferencing requirement.
Common Training Room AV Design Mistakes
Avoid these common problems:
Choosing Equipment Before Assessing the Room
Equipment should follow requirements rather than the other way around.
Installing a Screen That Is Too Small
A screen may look impressive from the front but still be difficult to read from the back.
Focusing Only on Audio Volume
Loud audio is not necessarily intelligible audio.
Ignoring Acoustics
Poor room acoustics can undermine even high-quality microphones and speakers.
Overcomplicating Controls
If users need extensive training just to start a presentation, the control system needs improvement.
Forgetting Connectivity
Modern training rooms should account for different laptops and presentation devices.
Ignoring Maintenance
Batteries, cables, firmware, microphones, displays, and network equipment all require ongoing management.
How to Plan a Training Room AV System
A practical AV planning workflow can be divided into seven stages:
Stage 1: Assess the Room
Measure the physical environment.
Stage 2: Identify Use Cases
Define how instructors, participants, and remote attendees will use the room.
Stage 3: Establish Performance Requirements
Define visibility, audio coverage, conferencing, control, and connectivity requirements.
Stage 4: Select Technology
Choose displays, projectors, speakers, microphones, cameras, control systems, and connectivity.
Stage 5: Develop the System Design
Create signal flow, equipment layouts, mounting plans, network requirements, and control logic.
Stage 6: Install and Commission
Install equipment and verify every component.
Stage 7: Train Users and Maintain the System
Provide simple user instructions and establish a maintenance process.
Frequently Asked Questions
What is training room AV design?
Training room AV design is the planning and integration of audiovisual equipment for teaching, presentations, collaboration, and hybrid learning. It can include displays, projectors, speakers, microphones, cameras, connectivity, control systems, lighting, and room acoustics.
What AV equipment does a training room need?
A typical training room may need a display or projector, speakers, microphones, presentation connectivity, control system, and appropriate cabling. Larger or hybrid rooms may also require cameras, conferencing equipment, digital signal processing, and networked AV.
How do I choose a display for a training room?
Choose the display based on viewing distance, room size, seating layout, content type, ambient light, resolution, and required image size. Training rooms that display detailed text often require careful consideration of visibility for participants seated farthest from the screen.
Are projectors better than displays for training rooms?
Neither technology is universally better. Displays can provide strong brightness and simple operation, while projectors can provide very large images in larger rooms. The best choice depends on room size, ambient lighting, viewing distance, budget, and installation requirements.
What type of microphone is best for training?
A headset or lavalier microphone can be effective for instructors who move around while teaching. Handheld microphones can work well for audience participation, while boundary or array microphones may be appropriate for conferencing and collaborative environments.
Why is audio important in training room design?
Participants need to understand spoken instructions clearly. Poor speaker coverage, excessive reverberation, background noise, or incorrect microphone placement can make training difficult to follow even when the presentation display is excellent.
What is an AV control system?
An AV control system provides a centralized interface for operating equipment such as displays, projectors, microphones, speakers, video conferencing systems, sources, and sometimes lighting. It can simplify common workflows through intuitive controls and presets.
How much does a training room AV system cost?
There is no single standard price because costs vary significantly based on room size, equipment selection, installation complexity, conferencing requirements, control systems, network infrastructure, acoustics, and integration requirements. A site assessment and detailed system specification are normally required for an accurate project estimate.
What should be considered when designing a hybrid training room?
A hybrid room should account for camera views, microphone pickup, echo cancellation, speaker placement, content sharing, lighting, network connectivity, conferencing software, and the experience of remote participants.
How can I improve training room AV reliability?
Use appropriate commercial-grade equipment, simplify user workflows, document the system, maintain spare cables and batteries, monitor equipment, keep software and firmware managed, and test the complete system regularly.
Conclusion
Effective training room AV design is about creating a consistent learning experience rather than simply installing individual audiovisual products.
The right combination of displays, audio, microphones, cameras, connectivity, control systems, acoustics, and lighting should make training easier for instructors and more engaging and accessible for participants.
Begin with the room and its users. Evaluate seating, viewing distance, room acoustics, ambient lighting, training formats, connectivity, and future requirements before selecting equipment.
For display planning, use appropriate screen and dimension calculations to determine whether the proposed display will provide adequate visibility. For projection environments, a Projector Screen Size Calculator can help establish appropriate screen dimensions. A Screen Dimension Calculator can also help determine display width, height, diagonal, and aspect ratio.
Finally, remember that successful AV integration depends on more than hardware. Usability, accessibility, reliability, documentation, testing, maintenance, and future scalability are equally important.
A well-designed training room AV system should feel simple to the instructor while delivering a consistent and professional experience to everyone in the room.
Screen Size Calculator: How to Calculate Screen Size, Dimensions & Aspect Ratio
A screen size calculator is a useful tool for finding the diagonal size, width, height, and other physical dimensions of a display. Whether you are comparing monitors, choosing a TV, checking laptop dimensions, planning a projector setup, or determining how much wall space a screen will occupy, understanding screen measurements can help you make more accurate decisions.
Screen size is normally expressed by the diagonal measurement of the visible display, rather than its width or height. For example, a 27-inch monitor has a display diagonal of approximately 27 inches. However, two screens with the same diagonal size can have different widths and heights when they use different aspect ratios.
This is why a screen size calculator is more useful than simply looking at the diagonal measurement. By combining screen size, aspect ratio, width, and height, you can determine the actual physical dimensions of a display.
For example, a 16:9 display and a 21:9 display can have the same diagonal measurement but significantly different proportions. Understanding this relationship is particularly important when buying a monitor, installing a TV, designing a home theater, or planning a projector screen.
In this guide, you will learn what a screen size calculator is, how screen size is measured, how to calculate screen dimensions, how aspect ratio affects dimensions, and how to calculate TV, monitor, and projector screen sizes.
Key Takeaways
A screen size calculator determines the diagonal, width, height, and sometimes area of a display.
Screen size is generally measured diagonally from one visible corner to the opposite corner.
The physical dimensions of a screen depend on both its diagonal size and aspect ratio.
Screen size and screen resolution are different measurements.
The diagonal can be calculated from width and height using the Pythagorean theorem.
A 16:9 display is wider than a 4:3 display with the same diagonal measurement.
TVs, monitors, laptops, smartphones, tablets, and projector screens can all be measured using similar geometric principles.
A screen dimension calculator can be useful when you know the width or height but need the remaining measurements.
Projector installations require additional considerations such as throw distance, aspect ratio, and viewing distance.
Always distinguish between the visible screen area and the overall physical dimensions of the device or screen frame.

What Is a Screen Size Calculator?
A screen size calculator is a mathematical or online tool that calculates the dimensions of a display based on known measurements such as diagonal size, width, height, and aspect ratio.
Depending on the calculator, you may enter one known measurement and an aspect ratio, and the tool can determine the remaining dimensions.
For example, if you know that a display is 27 inches with a 16:9 aspect ratio, a screen size calculator can estimate its visible width and height.
A calculator can commonly determine:
Screen diagonal
Screen width
Screen height
Aspect ratio
Display area
Inches-to-centimeters conversion
Centimeters-to-inches conversion
Why Use a Screen Size Calculator?
Manually calculating display dimensions can be useful for understanding the mathematics, but a calculator makes the process faster and reduces arithmetic errors.
A screen size calculator can help when:
Buying a new monitor
Comparing TV sizes
Planning a desk setup
Measuring laptop displays
Choosing a projector screen
Checking whether a display will fit a cabinet or wall
Comparing different aspect ratios
Planning a multi-monitor workspace
Estimating physical screen dimensions from diagonal size
How Is Screen Size Measured?
Screen size is generally measured diagonally across the visible display area, from one corner to the opposite corner.
For example, if a monitor is advertised as a 27-inch display, the approximately 27-inch measurement refers to the diagonal of the visible display.
It does not normally mean that the monitor is 27 inches wide.
How Do You Measure a Screen?
To physically measure a screen:
Identify one corner of the visible display.
Place the measuring tape at that corner.
Measure diagonally to the opposite corner.
Do not include the bezel unless you specifically want the overall device dimensions.
Record the measurement in inches or centimeters.
Does Screen Size Include the Bezel?
Usually, the advertised screen size refers to the display area, not the entire physical device.
For example, a monitor could have a 27-inch display but a physical body that is slightly wider and taller because of its bezel, stand, frame, or other components.
This distinction matters when checking whether a monitor or TV will physically fit into a specific space.
Screen Size vs Device Size
These terms should not be confused.
Screen size refers primarily to the visible display's diagonal measurement.
Device size refers to the overall physical dimensions of the product.
A television may have a 55-inch screen while the complete TV body is wider than the screen itself.
Screen Size vs Resolution vs Aspect Ratio
Three terms are frequently confused when discussing displays: screen size, resolution, and aspect ratio.
They describe different characteristics.
| Term | Meaning |
|---|---|
| Screen Size | Physical diagonal measurement of the display |
| Width | Horizontal physical dimension |
| Height | Vertical physical dimension |
| Resolution | Number of pixels displayed horizontally and vertically |
| Aspect Ratio | Relationship between screen width and height |
| PPI | Pixel density measured in pixels per inch |
What Is Screen Size?
Screen size describes the physical diagonal measurement of a display.
What Is Screen Resolution?
Resolution describes the number of pixels available on the screen.
Common examples include:
1920 × 1080
2560 × 1440
3840 × 2160
5120 × 1440
A higher resolution does not automatically mean a physically larger screen.
For example, a 27-inch monitor can have a 1080p, 1440p, or 4K resolution depending on the model.
What Is Aspect Ratio?
Aspect ratio describes the proportional relationship between the width and height of a display.
For example:
16:9
means that for every 16 units of width, the screen has 9 units of height.
Other common aspect ratios include:
4:3
16:10
3:2
21:9
32:9
Therefore, screen size, resolution, and aspect ratio should be considered separately.
How to Calculate Screen Size
The simplest way to calculate screen size when you know the width and height is to use the Pythagorean theorem.
Screen Size Formula
Diagonal = √(Width² + Height²)
Here:
Width = horizontal screen measurement
Height = vertical screen measurement
Diagonal = screen size
Example: Calculate Screen Size From Width and Height
Suppose a display has:
Width = 24 inches
Height = 13.5 inches
The diagonal is:
Diagonal = √(24² + 13.5²)
Diagonal = √(576 + 182.25)
Diagonal = √758.25
The resulting diagonal is approximately 27.5 inches.
This illustrates why screen size is traditionally represented by its diagonal rather than its width.
How to Calculate Screen Size From Width and Height
Follow these steps:
Measure the screen width.
Measure the screen height.
Square the width.
Square the height.
Add the two values.
Calculate the square root.
The result is the approximate diagonal screen size.
A screen size calculator performs these calculations automatically.
How to Calculate Screen Dimensions From Aspect Ratio
If you know the screen's diagonal and aspect ratio, you can calculate its width and height.
This is especially useful when a manufacturer provides the diagonal but you need to know whether the display will fit a particular space.
Suppose the aspect ratio is:
16:9
That means:
Width : Height = 16 : 9
The width and height can be represented as:
Width = 16x
Height = 9x
The diagonal is then determined using the relationship:
Diagonal = √((16x)² + (9x)²)
Once the value of x is determined, the width and height can be calculated.
Example: 27-Inch 16:9 Display
For a 27-inch display with a 16:9 aspect ratio, the approximate visible dimensions are:
Width: 23.53 inches
Height: 13.24 inches
Diagonal: 27 inches
In centimeters, that is approximately:
Width: 59.77 cm
Height: 33.63 cm
Diagonal: 68.58 cm
These figures represent the display area and should not be treated as the exact outer dimensions of a particular monitor.
Why Aspect Ratio Matters
Imagine two displays that are both 27 inches diagonally.
One is 16:9.
The other is 21:9.
Although both have approximately the same diagonal, the 21:9 display is considerably wider and shorter.
Therefore, diagonal size alone does not tell you the complete physical dimensions of a screen.
Screen Size and Aspect Ratio Chart
The following examples show approximate visible dimensions for common 16:9 screens.
| Screen Size | Approx. Width | Approx. Height | Approx. Diagonal |
|---|---|---|---|
| 13" | 11.33" | 6.37" | 13" |
| 15.6" | 13.59" | 7.64" | 15.6" |
| 24" | 20.92" | 11.77" | 24" |
| 27" | 23.53" | 13.24" | 27" |
| 32" | 27.89" | 15.69" | 32" |
| 43" | 37.48" | 21.08" | 43" |
| 50" | 43.58" | 24.51" | 50" |
| 55" | 47.94" | 26.97" | 55" |
| 65" | 56.65" | 31.87" | 65" |
| 75" | 65.37" | 36.77" | 75" |
| 85" | 74.04" | 41.65" | 85" |
Actual manufacturer dimensions can vary slightly because product specifications may refer to the visible panel, bezel, frame, or complete device.
Common Aspect Ratios
| Aspect Ratio | Common Applications |
|---|---|
| 4:3 | Older monitors, legacy displays |
| 16:9 | TVs, monitors, laptops, video |
| 16:10 | Productivity monitors and laptops |
| 3:2 | Some laptops and tablets |
| 21:9 | Ultrawide monitors |
| 32:9 | Super-ultrawide monitors |
The same diagonal measurement will produce different width and height values depending on the aspect ratio.
TV Screen Size Calculator
A TV screen size calculator can help determine the approximate width and height of a television when you know its diagonal and aspect ratio.
Most modern televisions use a widescreen format, commonly 16:9.
For example, a 55-inch 16:9 television has an approximate visible display width of 47.94 inches and height of 26.97 inches.
A 65-inch 16:9 television has an approximate visible display width of 56.65 inches and height of 31.87 inches.
However, these measurements do not necessarily represent the complete physical dimensions of the TV. The bezel, frame, stand, and other design elements can add to the overall size.
How to Choose the Right TV Size
When selecting a TV, consider:
Wall width
Available cabinet space
Viewing distance
TV aspect ratio
TV stand dimensions
Mounting requirements
Screen resolution
Room layout
A screen size calculator can determine the display dimensions, while the manufacturer's product specifications should be used to verify the final physical dimensions before installation.
Monitor Screen Size Calculator
A monitor screen size calculator is useful for determining the physical dimensions of computer displays.
Common monitor sizes include:
21.5 inches
24 inches
27 inches
32 inches
34 inches
38 inches
49 inches
For standard 16:9 monitors, a 27-inch display is approximately 23.53 inches wide and 13.24 inches high in terms of visible screen area.
However, ultrawide monitors require different calculations.
Ultrawide Monitor Dimensions
A 34-inch 21:9 monitor has a different shape from a 34-inch 16:9 monitor.
The diagonal is the same, but the ultrawide monitor is substantially wider.
This is an important consideration when planning:
Desk space
Monitor arms
Multi-monitor setups
Wall-mounted displays
Gaming stations
Productivity workstations
Curved Monitor Considerations
Curved monitors can introduce additional complexity when physically measuring the product.
The advertised diagonal is still based on the display's specified measurement, but the physical depth and outer dimensions can differ from a flat display.
Always check the manufacturer's dimensions when determining whether a curved monitor will fit into a particular workspace.
Projector Screen Size Calculator
Projector screens follow the same basic relationship between diagonal, width, height, and aspect ratio, but projector installations introduce additional variables.
A projector screen calculator can be used to determine:
Screen width
Screen height
Screen diagonal
Aspect ratio
Projector-to-screen distance
Throw ratio
Viewing area
For example, projector calculators can combine screen dimensions with projector model, lens information, room dimensions, aspect ratio, and throw distance. BenQ's projector calculator includes screen diagonal, width, height, aspect ratio, room dimensions, and projector-to-screen distance as part of its planning interface.
You can also use our Projector Screen Size Calculator to calculate the dimensions of a projector screen based on the measurements you already know.
A projector screen calculator is particularly useful for:
Home theaters
Classrooms
Conference rooms
Training rooms
Offices
Cinemas
Large-format presentations
For projector installations, remember that screen size alone is not enough. Throw ratio, projector lens characteristics, room depth, mounting position, image aspect ratio, and seating distance can affect the final installation.
Top Software and Online Tools to Calculate Screen Size
Several online tools can help calculate or compare screen dimensions. The best choice depends on whether you need a simple mathematical calculation, screen comparison, or projector planning.
1. Screen Size Calculator
A dedicated screen size calculator is ideal when you already know one dimension and need to calculate the others.
A useful calculator should allow you to enter:
Diagonal
Width
Height
Aspect ratio
Measurement unit
The calculator can then return the remaining dimensions.
2. Display Wars
Display Wars is useful for visually comparing different screen sizes. It allows users to compare displays by size and aspect ratio, making it particularly useful when deciding between TVs, monitors, tablets, and other displays.
Its visual comparison approach is useful when raw dimensions do not provide an intuitive sense of how large two screens will appear side by side.
3. Inch Calculator Screen Size Calculator
Inch Calculator provides a dedicated screen size calculator where users can select an aspect ratio and enter a known dimension such as diagonal, width, or height. The tool then calculates the remaining screen measurements.
It also explains the underlying screen-size calculation process, which makes it useful for users who want both the tool and the mathematical explanation.
4. Projector Calculators
Projector-specific calculators are more appropriate when you are designing a projection system.
For example, ProjectorScreen.com's calculator tools allow users to work with screen size, dimensions, aspect ratios, viewing distances, and projector-related measurements.
BenQ also provides a projector calculator that incorporates room dimensions, projector model, lens information, aspect ratio, screen size, and projector-to-screen distance.
5. Display Planning Calculators
Some newer display calculators combine multiple functions, including physical screen dimensions, pixel density, TV viewing distance, and projector calculations.
The right tool depends on your objective:
| Requirement | Recommended Tool Type |
|---|---|
| Calculate screen dimensions | Screen size calculator |
| Compare two displays | Screen comparison tool |
| Calculate monitor dimensions | Monitor/screen calculator |
| Calculate TV dimensions | TV size calculator |
| Plan projector installation | Projector calculator |
| Calculate projector screen dimensions | Projector screen size calculator |
| Calculate pixel density | PPI calculator |
| Compare aspect ratios | Aspect ratio calculator |
Frequently Asked Questions
What is a screen size calculator?
A screen size calculator is a tool that calculates a display's diagonal, width, height, or related dimensions using measurements such as aspect ratio, width, or height. It can be used for TVs, monitors, laptops, tablets, smartphones, and projector screens.
How do you calculate screen size?
If you know the screen's width and height, calculate the diagonal using the formula √(width² + height²). The result represents the approximate diagonal screen size. If you know the diagonal and aspect ratio, you can calculate the corresponding width and height.
How is TV screen size measured?
TV screen size is generally measured diagonally across the visible display, from one corner to the opposite corner. The measurement usually excludes the outer frame and stand. A TV's overall physical dimensions will therefore be larger than its advertised screen size.
What does 16:9 mean on a screen?
A 16:9 aspect ratio means the screen has 16 units of width for every 9 units of height. It is commonly used for modern televisions, video content, monitors, laptops, and streaming media.
Does screen size mean width?
No. Screen size normally refers to the diagonal measurement of the visible display. Width is a separate horizontal measurement. For example, a 27-inch 16:9 monitor is approximately 23.53 inches wide rather than 27 inches wide.
Does a larger screen have a higher resolution?
Not necessarily. Screen size and resolution measure different things. A large display can have a relatively low resolution, while a smaller display can have a very high resolution. Resolution describes the number of pixels, while screen size describes physical display dimensions.
How do I calculate screen dimensions?
To calculate screen dimensions, you need the diagonal measurement and aspect ratio, or the width and height. A screen size calculator can use these values to determine the remaining dimensions.
How big is a 27-inch 16:9 screen?
A 27-inch 16:9 display has an approximate visible width of 23.53 inches and height of 13.24 inches. Its diagonal is 27 inches. The actual overall monitor dimensions will be slightly larger depending on the bezel and chassis.
How big is a 55-inch 16:9 TV?
A 55-inch 16:9 display is approximately 47.94 inches wide and 26.97 inches high in terms of visible screen area. The complete TV will generally be larger because of its frame and other physical components.
How do I calculate projector screen size?
Projector screen size can be calculated using the screen's diagonal, width, height, and aspect ratio. Projector installations may also require throw ratio and projector-to-screen distance calculations. A dedicated projector screen size calculator is useful for this purpose.
Can two screens have the same size but different dimensions?
Yes. Two displays can have the same diagonal measurement but different widths and heights because of different aspect ratios. For example, a 16:9 screen and a 21:9 screen with the same diagonal will have noticeably different proportions.
What is the difference between screen size and screen dimensions?
Screen size normally refers to the diagonal measurement, while screen dimensions refer to the width and height. For example, a display can be described as a 27-inch screen with dimensions of approximately 23.53 × 13.24 inches when using a 16:9 aspect ratio.
Should I measure the bezel when calculating screen size?
No, if you want the advertised display size. Measure only the visible screen area from one corner to the opposite corner. If you need to know whether the complete device will fit into a space, measure or check the manufacturer's overall width and height instead.
What aspect ratio is best for a monitor?
There is no single best aspect ratio for every user. 16:9 is versatile and widely supported, while 16:10 can provide additional vertical workspace. Ultrawide ratios such as 21:9 or 32:9 can be useful for gaming, multitasking, and wide productivity workflows.
Conclusion
A screen size calculator makes it easier to understand the physical dimensions of a display without performing complicated calculations manually. By using the diagonal measurement, aspect ratio, width, and height, you can determine how large a screen actually is and whether it will fit your intended space.
The most important concept to remember is that screen size is generally the diagonal measurement, while screen dimensions describe width and height. Aspect ratio connects these measurements and determines the physical shape of the display.
For example, two 27-inch displays can have different dimensions if they use different aspect ratios. Similarly, a 55-inch TV's advertised diagonal does not mean that the TV is 55 inches wide.
A screen size calculator is useful for TVs, monitors, laptops, smartphones, tablets, and projector screens. For projector installations, additional factors such as throw distance and projector specifications should also be considered.
If you need a quick calculation, use a Screen Size Calculator to determine the diagonal, width, height, and aspect ratio of your display. For more specialized calculations, explore our Screen Dimension Calculator and Projector Screen Size Calculator.
Understanding these measurements helps you make better decisions when buying displays, planning workspaces, installing home theaters, or designing professional presentation environments.